An Example Process#
Lets build an example process for checking in a user to a building. We will call this access management.
Process name: Building Access Request
Steps to Creating a Process#
You should always document your process first.
Build the model
Write the prose
Identify data
Define data in the system
Build the process parts
Model the process
Test, review, repeat from 5 if necessary
Implement
Model Process#
        graph TD
    style End stroke-width:6px, width: 10px
    Start((Start))
    A[Register for visit]
    B[Check-in]
    C[Check-out]
    End((End))
   Start --> A
   A --> B
   B --> C
   C --> End
To build this process we need to prepare our system by creating the identified fields, for which we need to collect data.
Prose text#
A verbal description of the process, to help identify data and the parts of a process.
A user requests access to a facility beginning at ond ending on specific dates. The user must provide the dates of attendance per visitation, the facility to be visited, and the contact person within the organization. Upon arrival and on departure, the desk agent must enter the time and date of entry.
Identify Data#
The ticket requires, in addition to the user provided data, ticket data. It will be registered to the postmaster queue as a new ticket. It will be unlocked and of type “Access Request” with the normal priority. It will not be assigned to a specific user.
Define Data#
Dynamic field data to be collected:
- Facility
As a drop down field.
- Personal Contact
As a text field.
- Purpose of Visit
As a text area.
- Begin of Visit
As a date field.
- End of Visit
As a date field.
- Check-in Time
As a date time field.
- Check-out Time
As a date time field.
Note
I will not show how to create dynamic fields. See Extend Ticket Data (Dynamic Fields)
Build Process Parts#
To build the process, we must understand our workflow and identify its different parts. We recommend using BPMN .
Note
BPMN
The Business Process Modeling Notation (BPMN) is visual modeling language, which is an open standard notation for graphical flowcharts that is used to define business process workflows. It is popular and intuitive graphic that can be easily understand by all business stakeholders, including business users, business analysts, software developers, and data architects.
Roughly stated, each activity is represented as an user activity in Znuny and consists of an Activities Element and one or more Activity Dialogs.
We will start by modeling the process with tow activities and three dialogs.
Create a New Process#
Navigate to
Admin > Process ManagementClick Create New Process
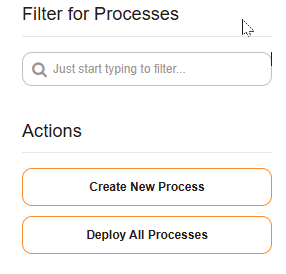
Process Management Actions Menu#
Add process name and description
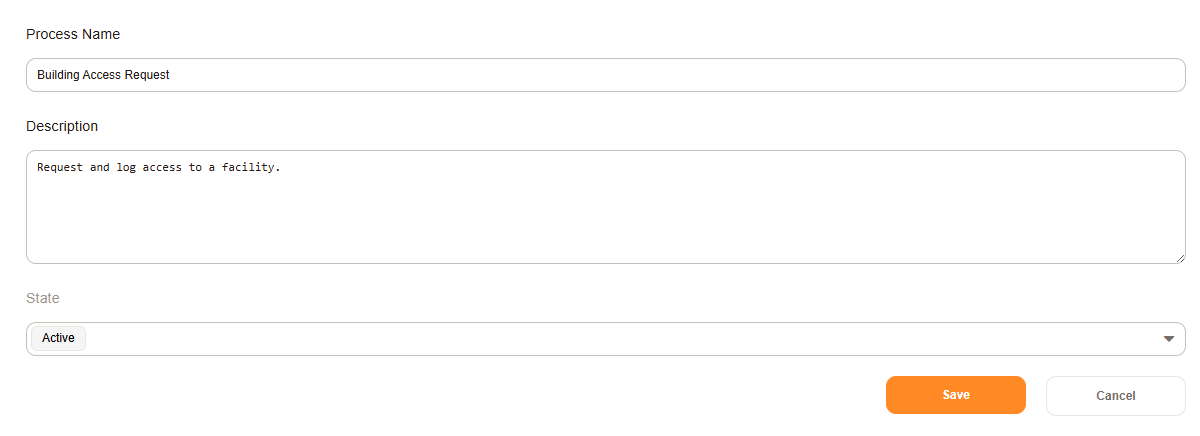
Name and Description#
Save
Add Activities#
We will identify two activities here. You can create a new activity in the process elements list.
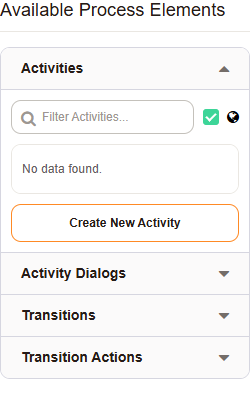
Add an activity.#
Register for Visit
Register for Visitation#
Record Visit
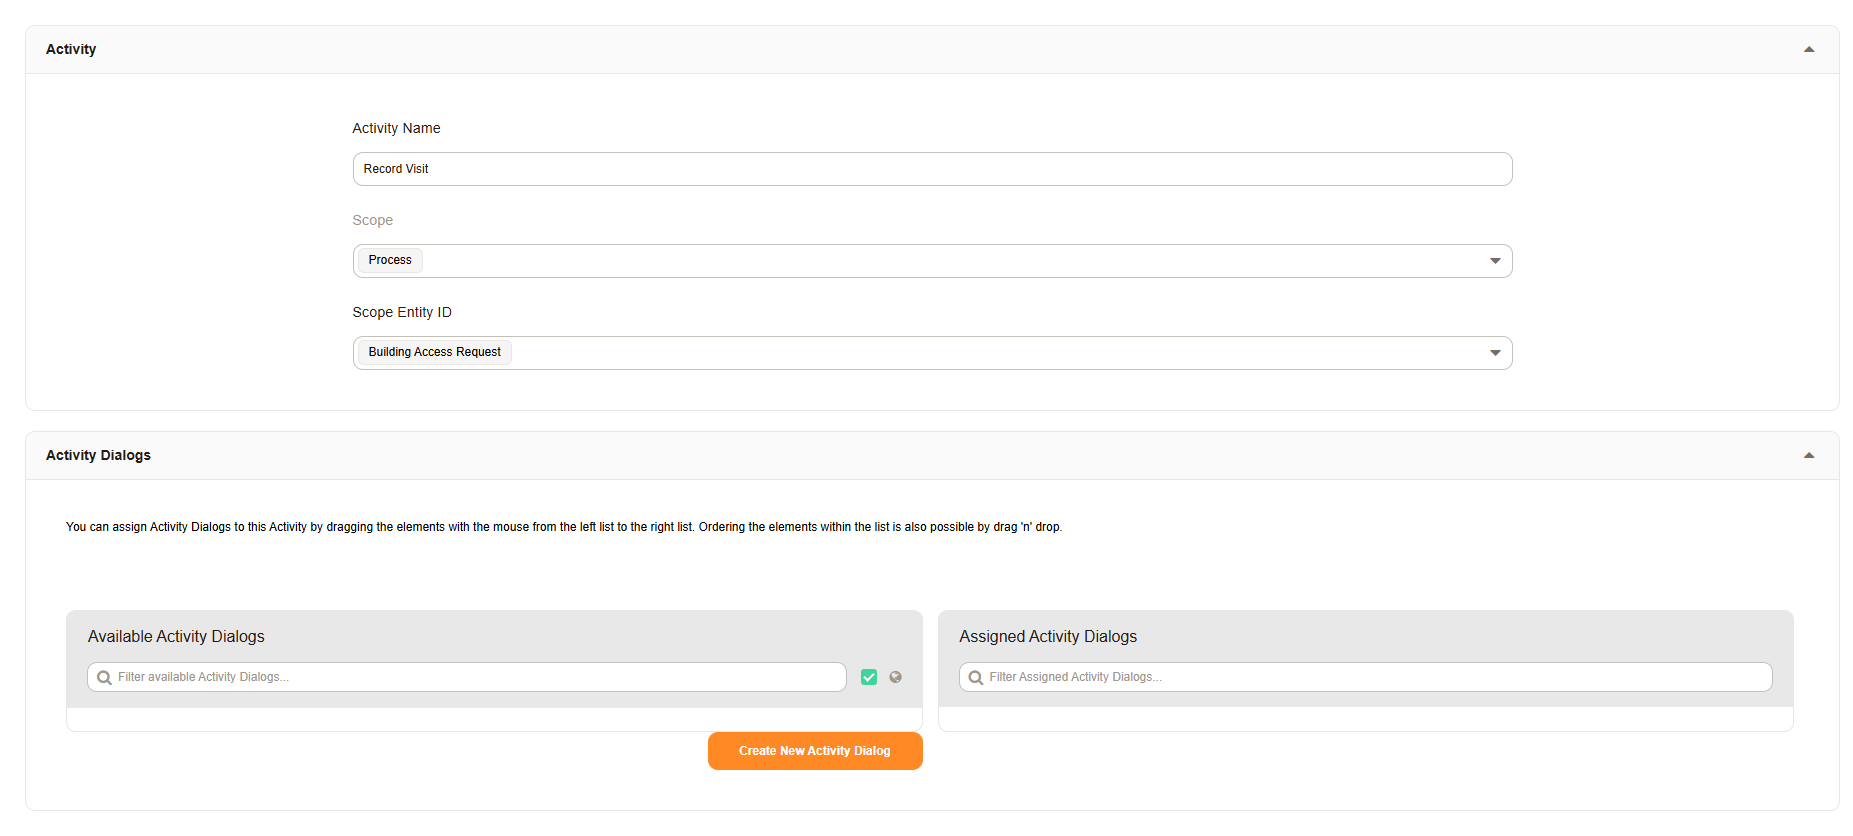
Record Visitation#
Process End
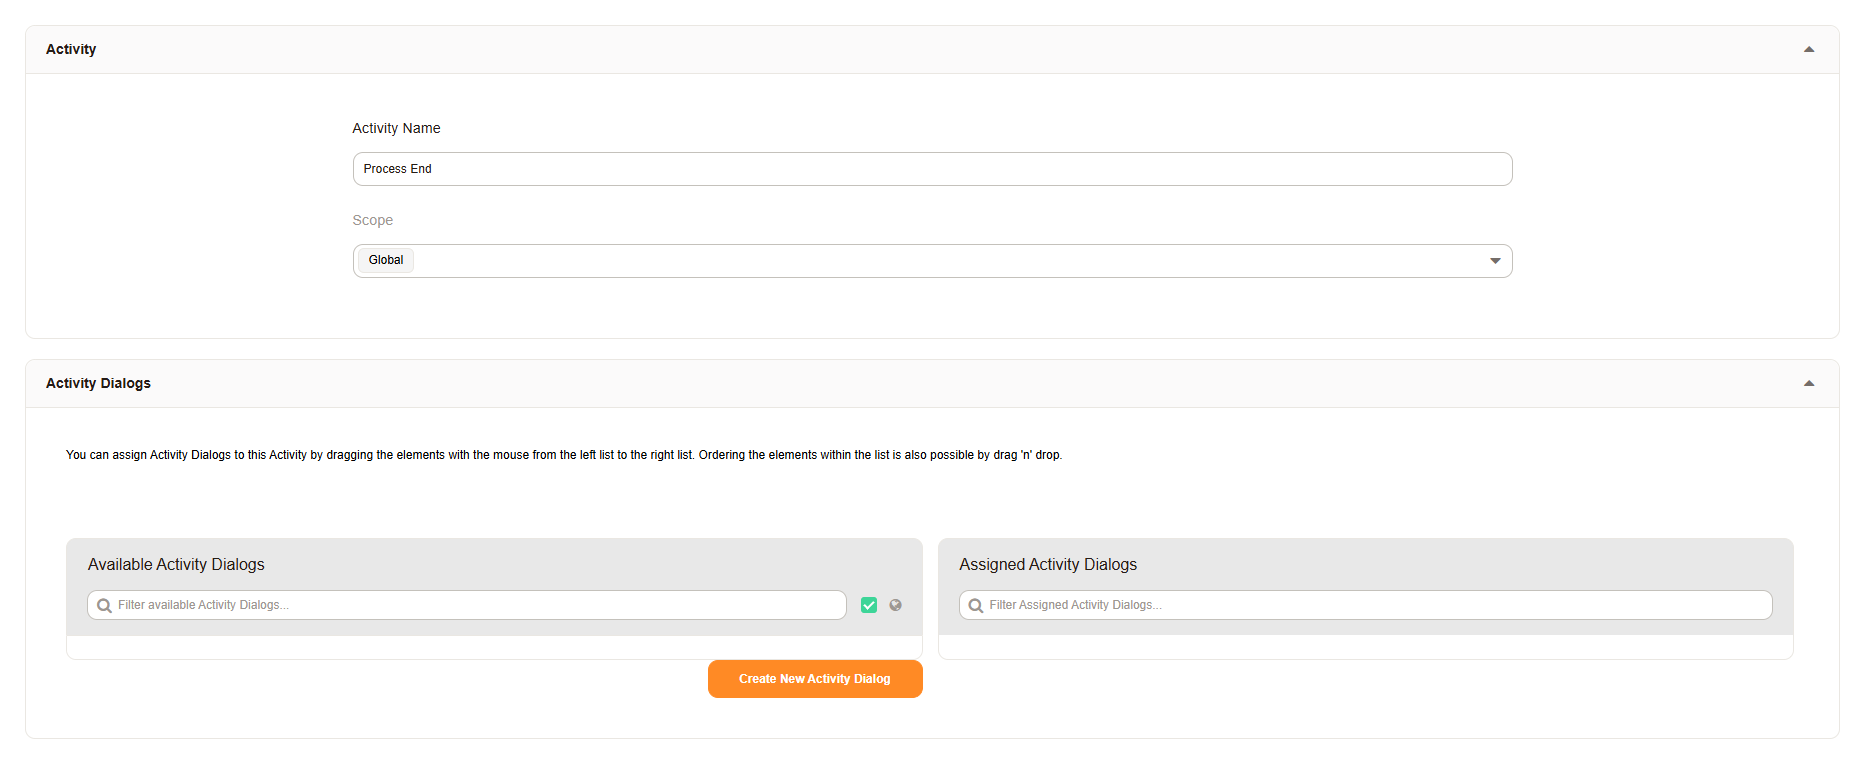
Process Ended#
Note
Process End
This is used as a general place holder, to allow us to later apply final ticket data via the Transition Actions
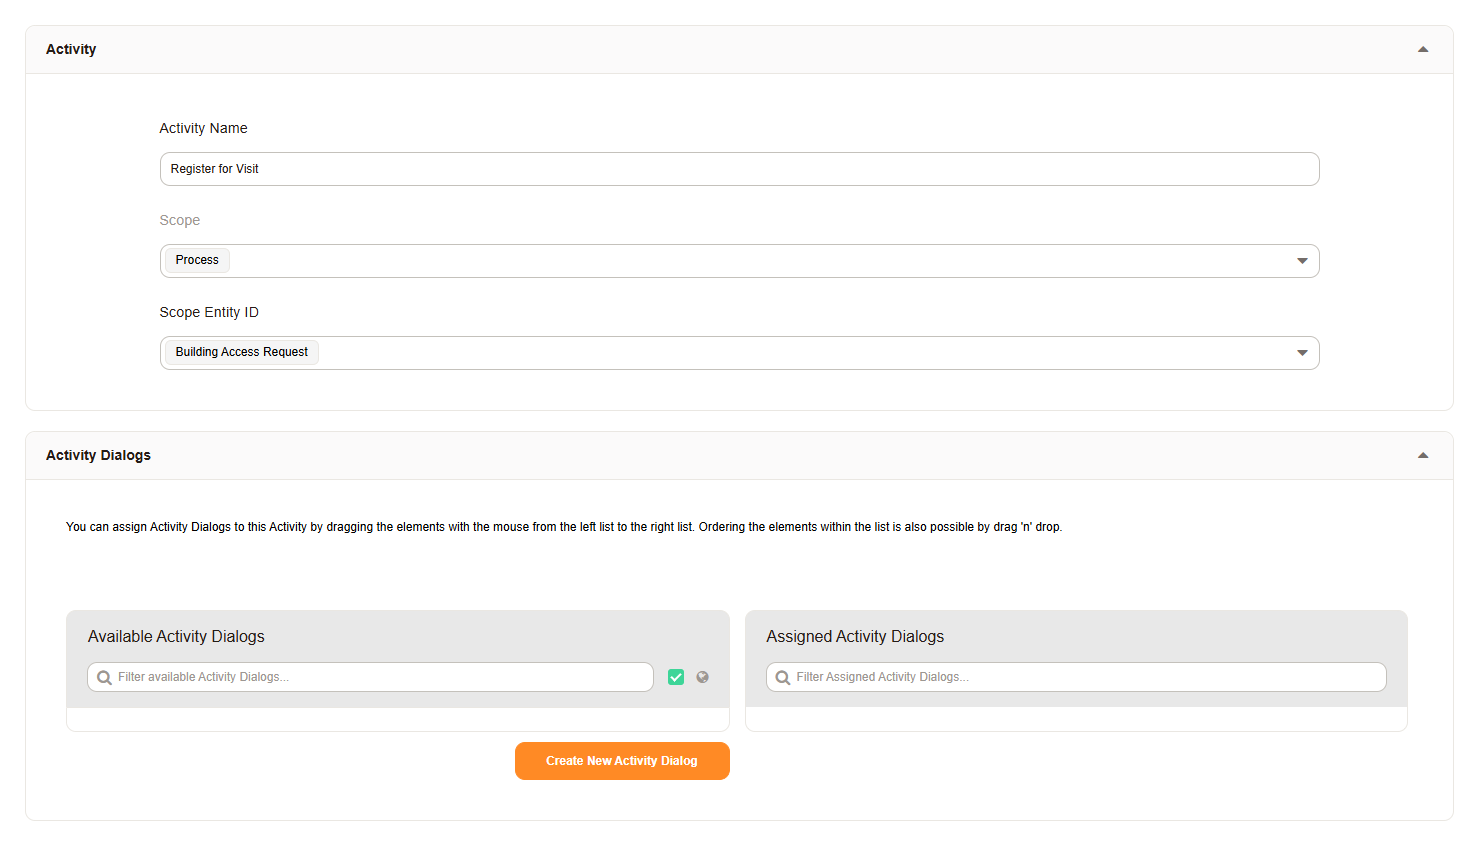
Add Activity Dialogs#
We will identify some of the activities in our model, as dialogs of the activity Record Visit, where we collect the check-in and checkout time.
You can create a new activity dyalog in the process elements list. Here we will:
define who can use the dialog
define the fields and field order
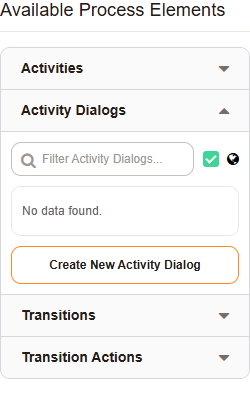
Add an activity dialog.#
Visitation Application
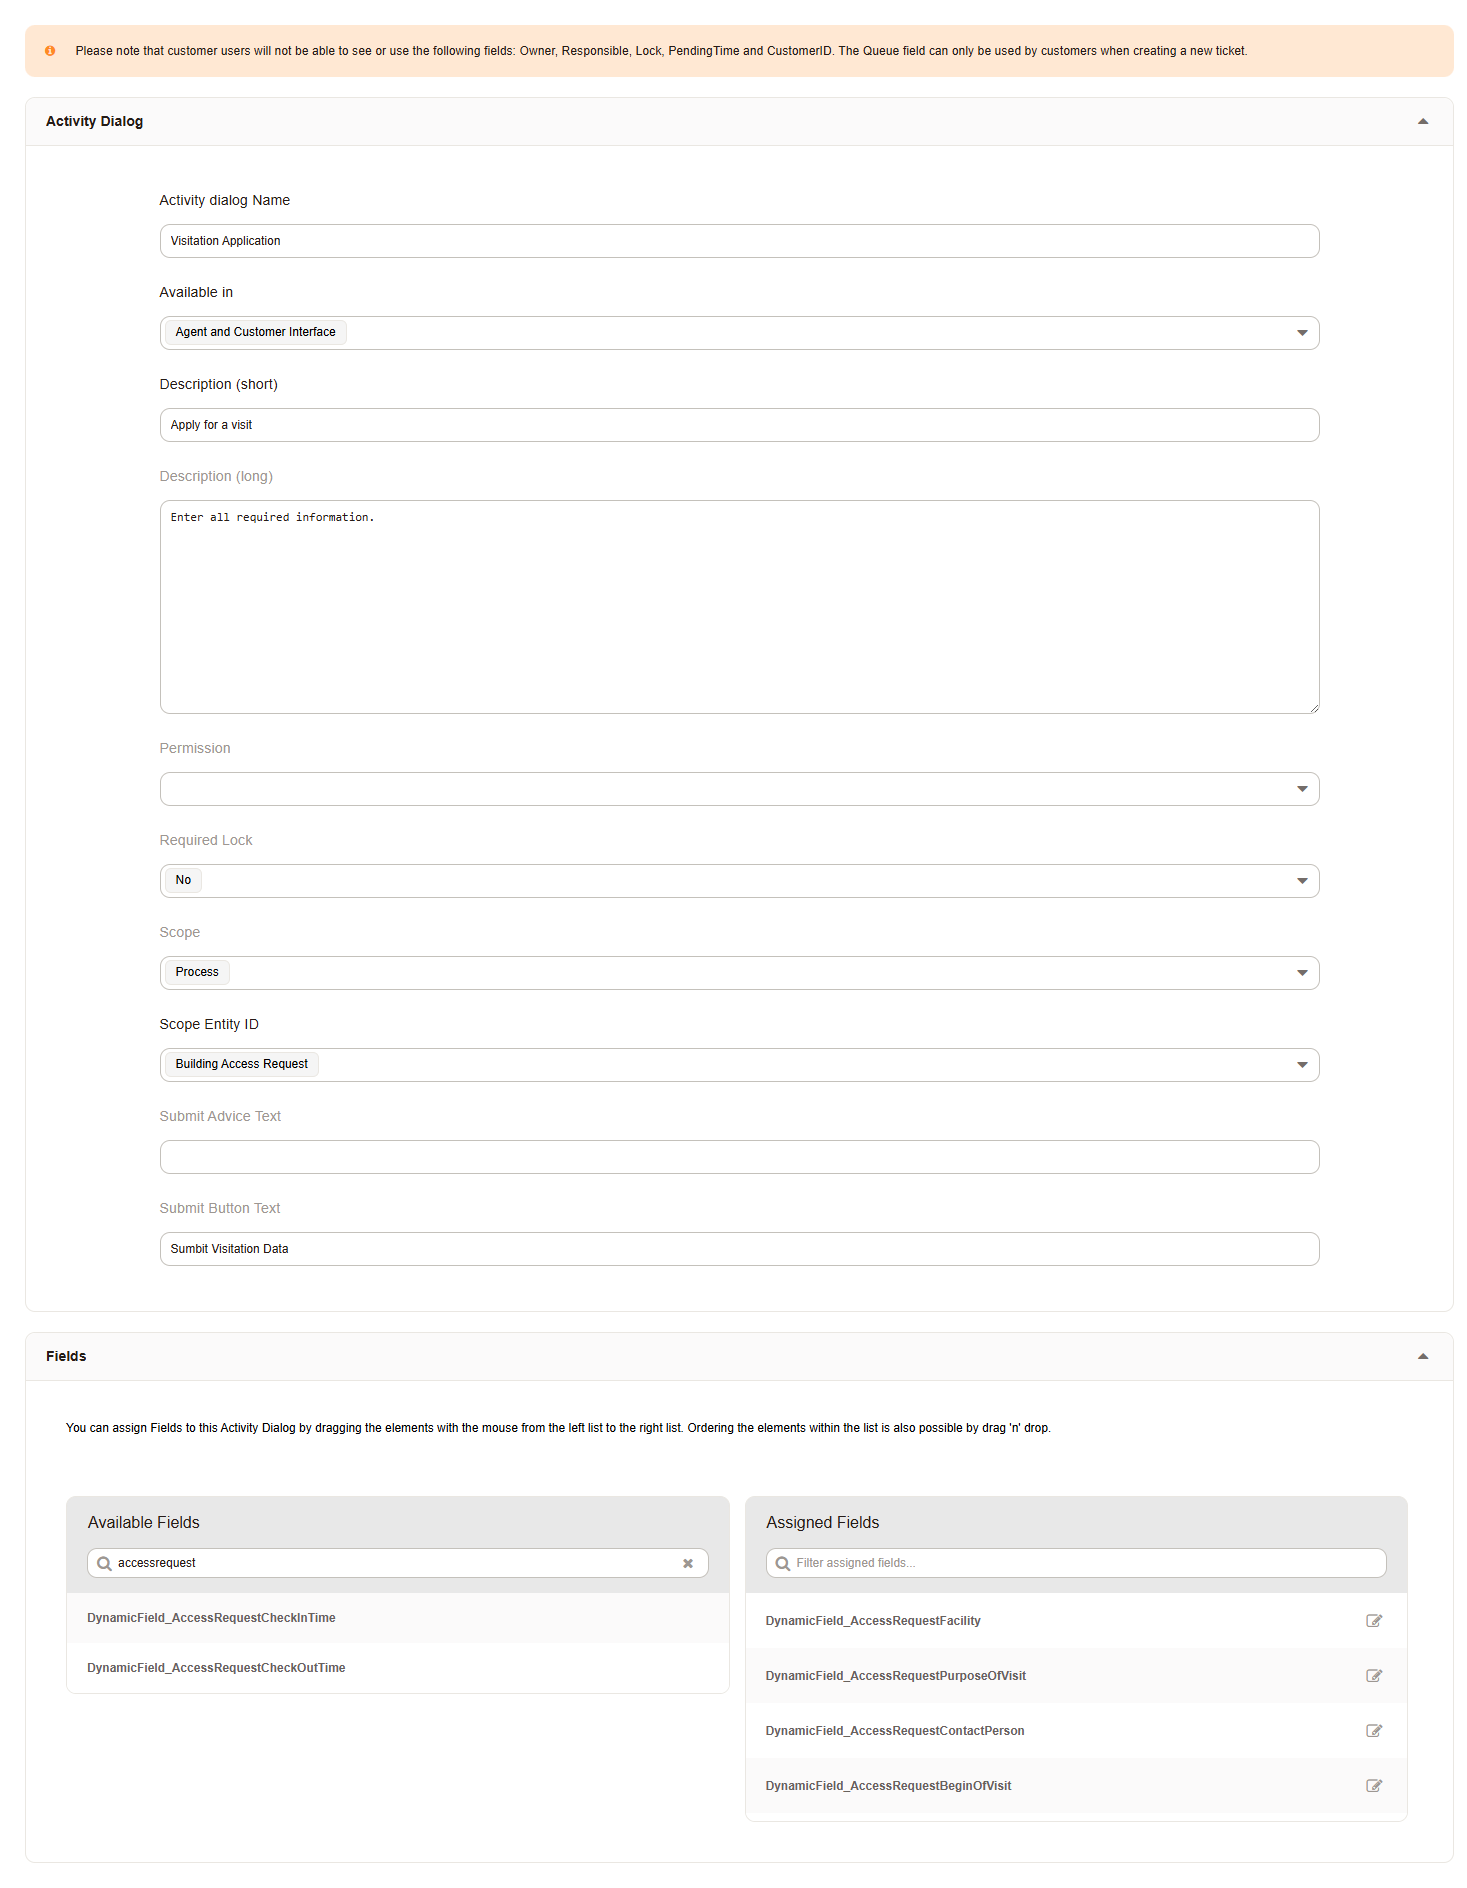
Register for Visitation Dialog#
Check-in
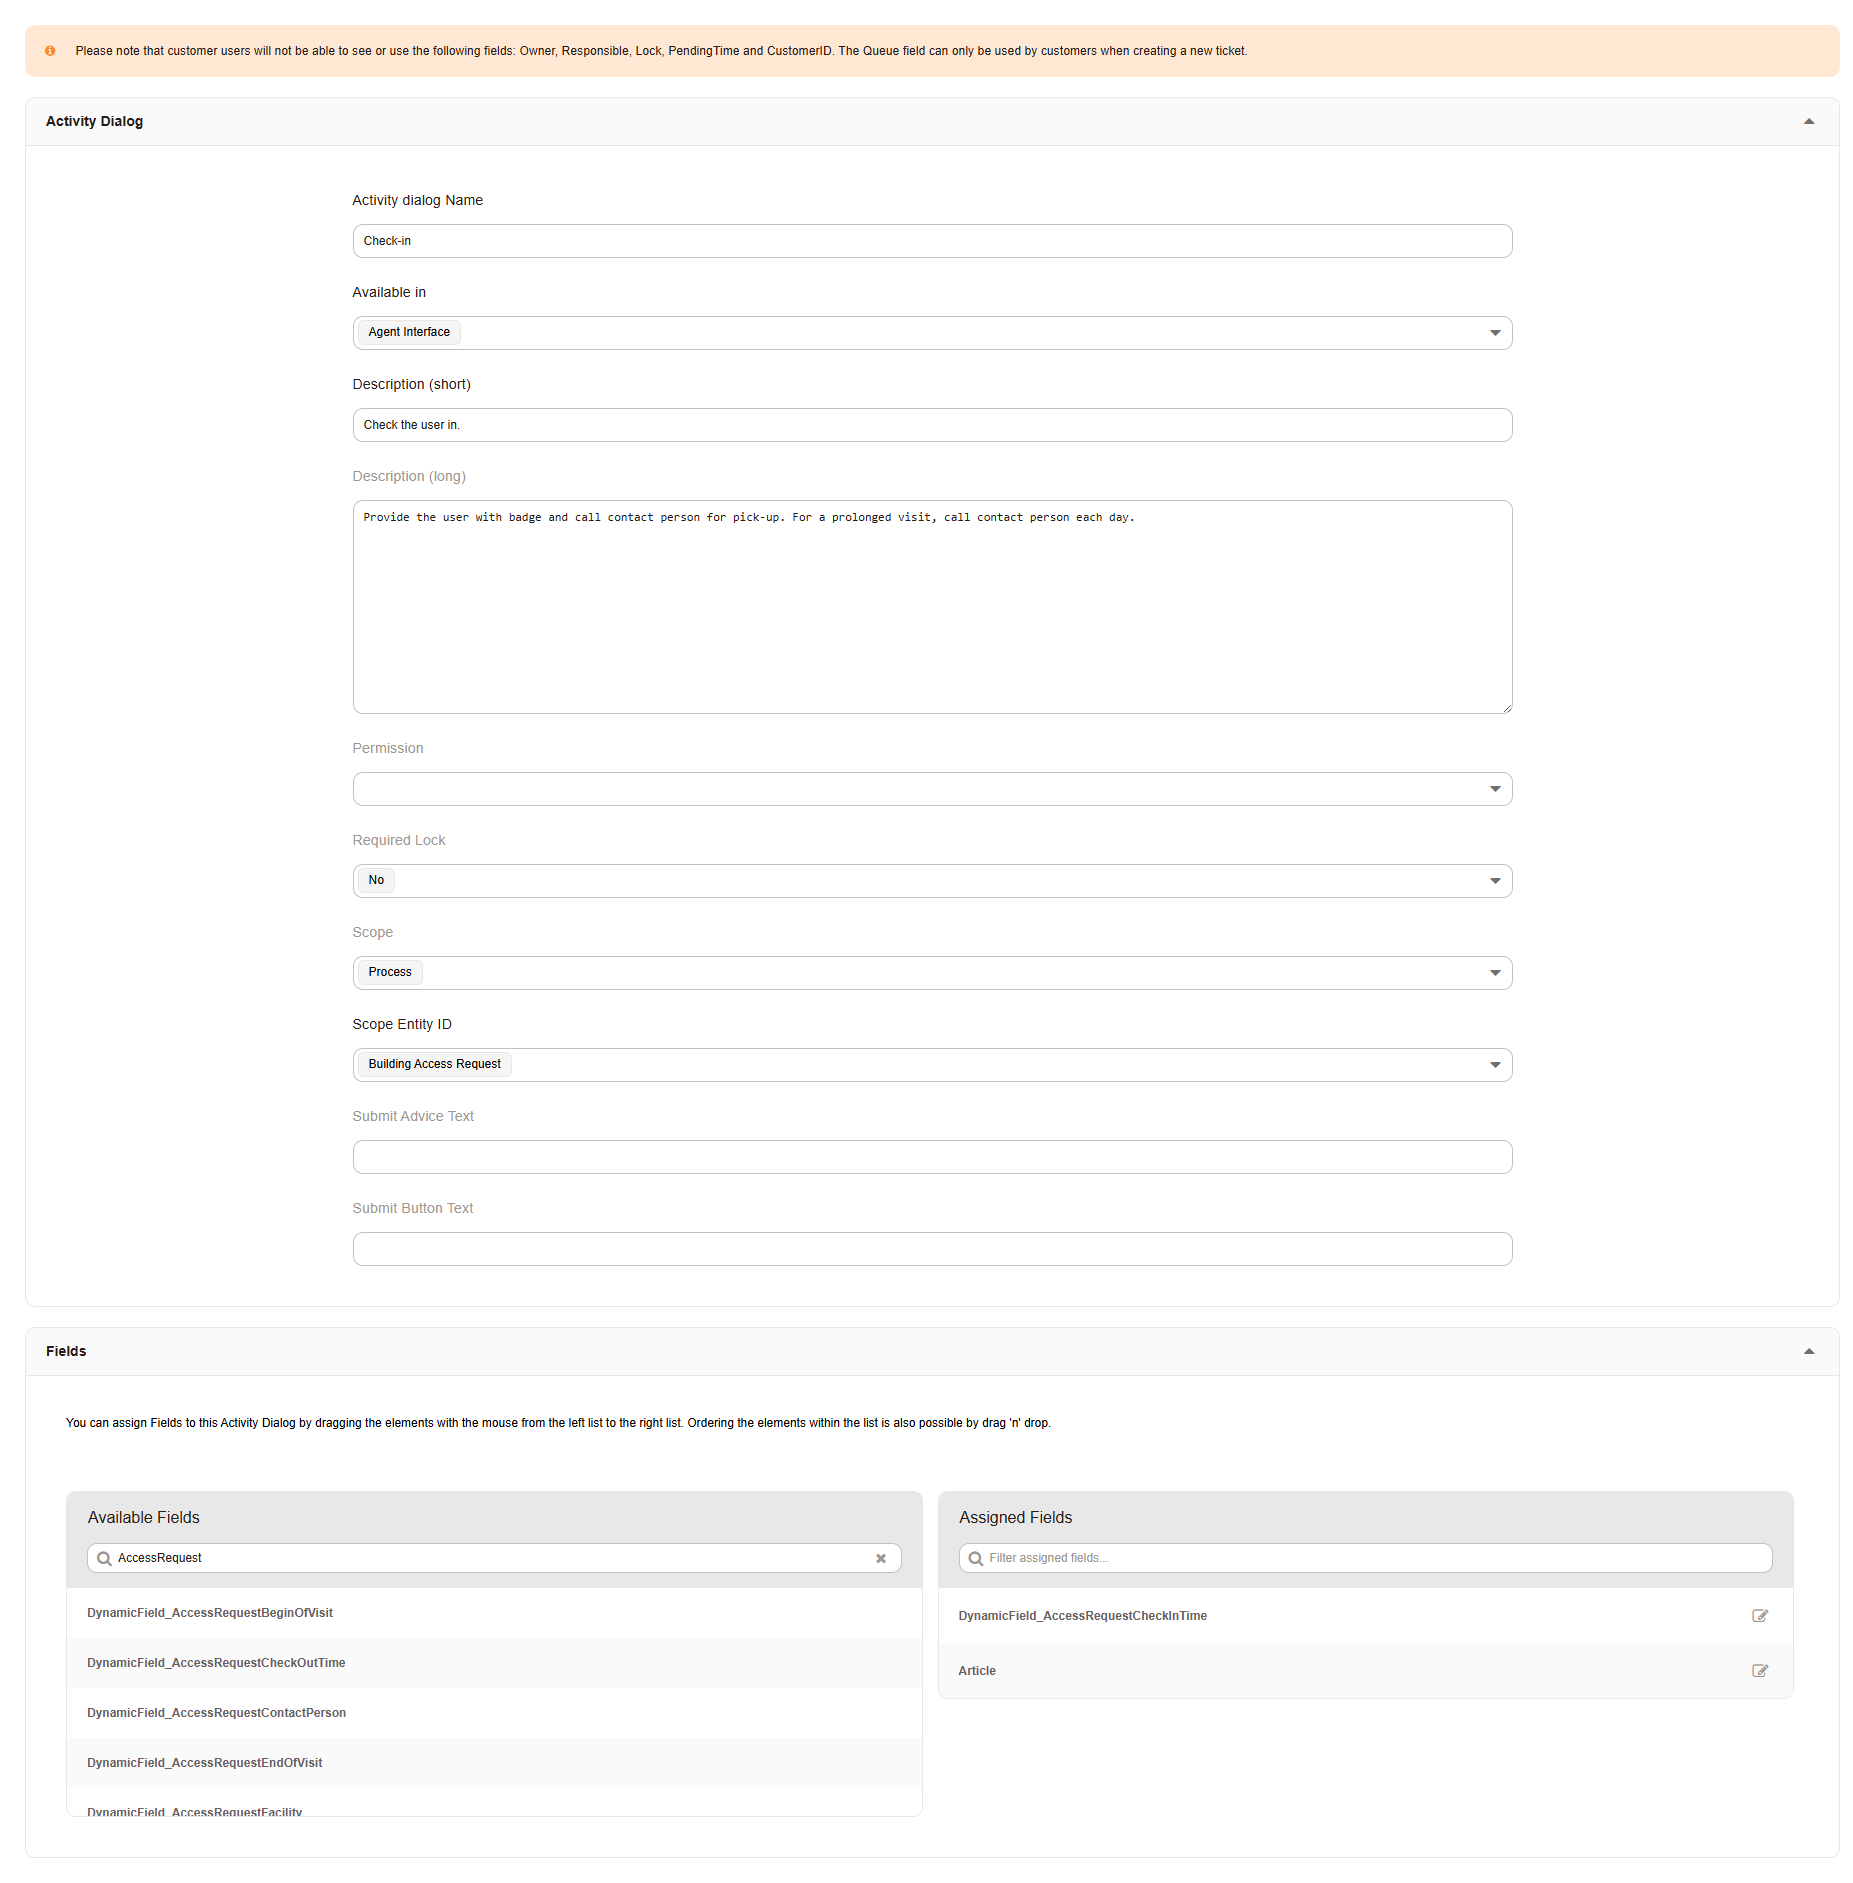
Check-in Dialog#
Check-out

Check-out Dialog#
Add Transitions#
We will add a transition to evaluate the data entered, and move our process between activities.
You can create a new transition in the process elements list.
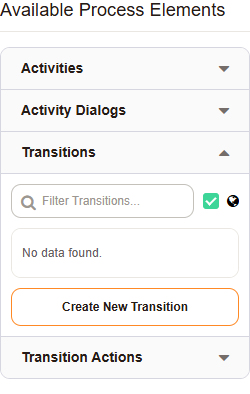
Add a transition.#
Application Recorded: Verify the ticket state via a regular expression, because a ticket always has state and we made all fields mandatory.
User checked out: Verify the user checked out.
Add Transition Actions#
We will add actions to be applied to the ticket during each step of the process. This automation allows us to streamline the process for the user. This eliminates many confusing aspects, and allows us to modify the process at any time, without it changing for the user. The user just has to enter data.
You can create a new transition action in the process elements list.
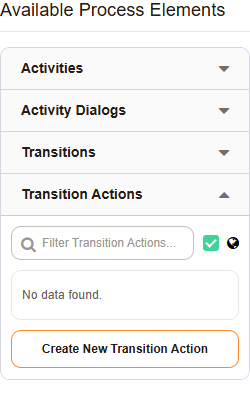
Add a transition action.#
Pending 24 Hours
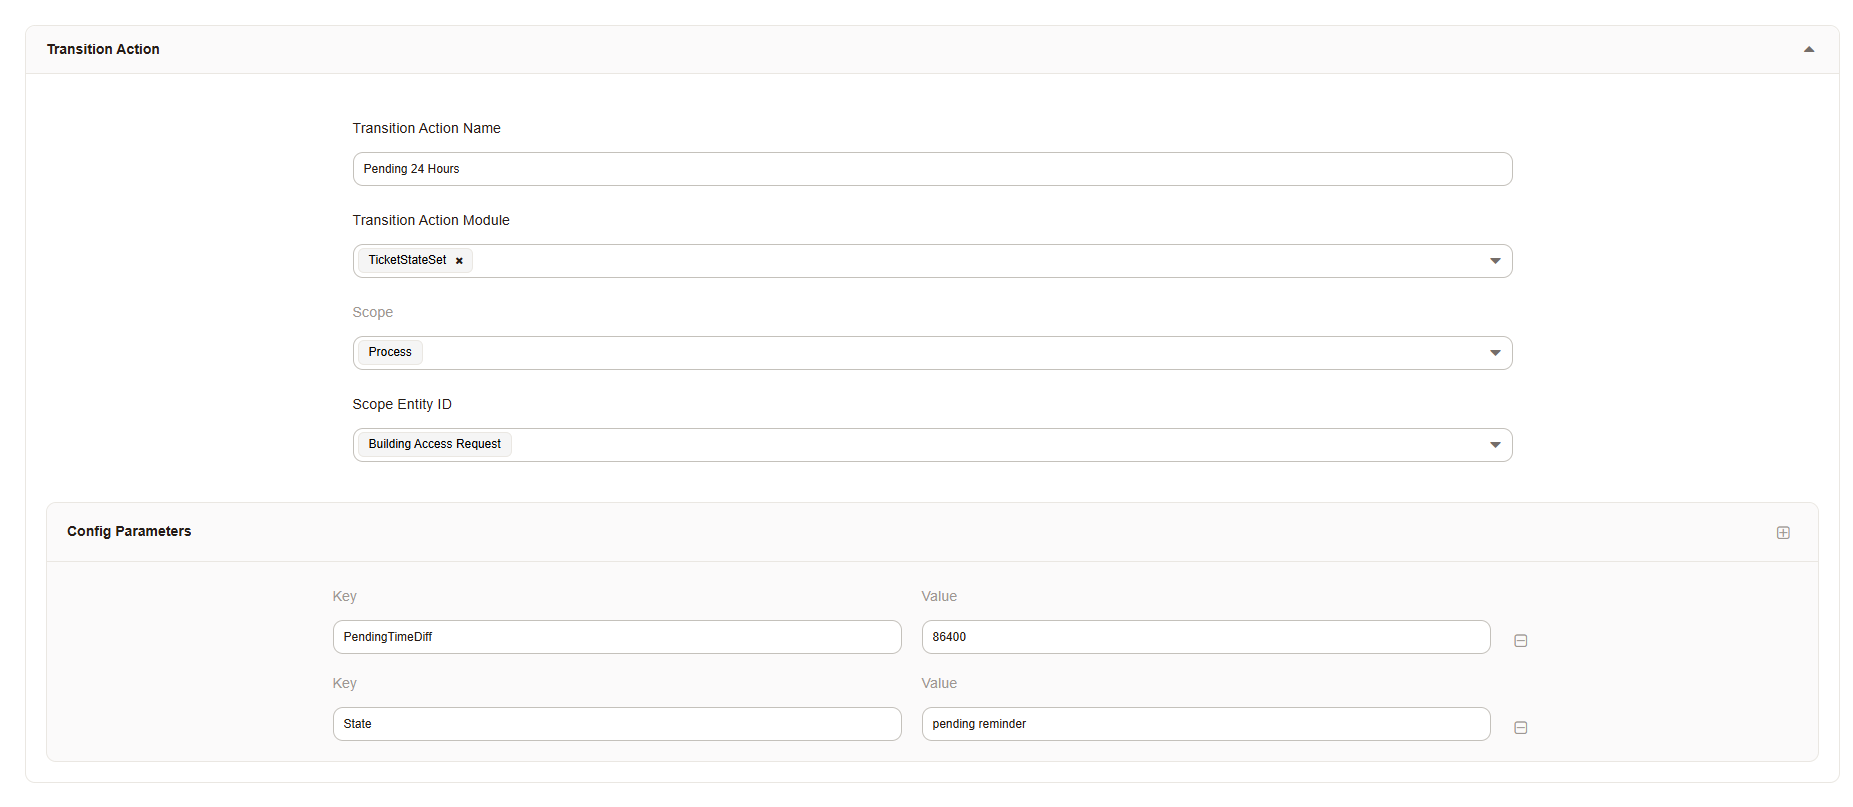
Set pending state and Time#
Ticket closed
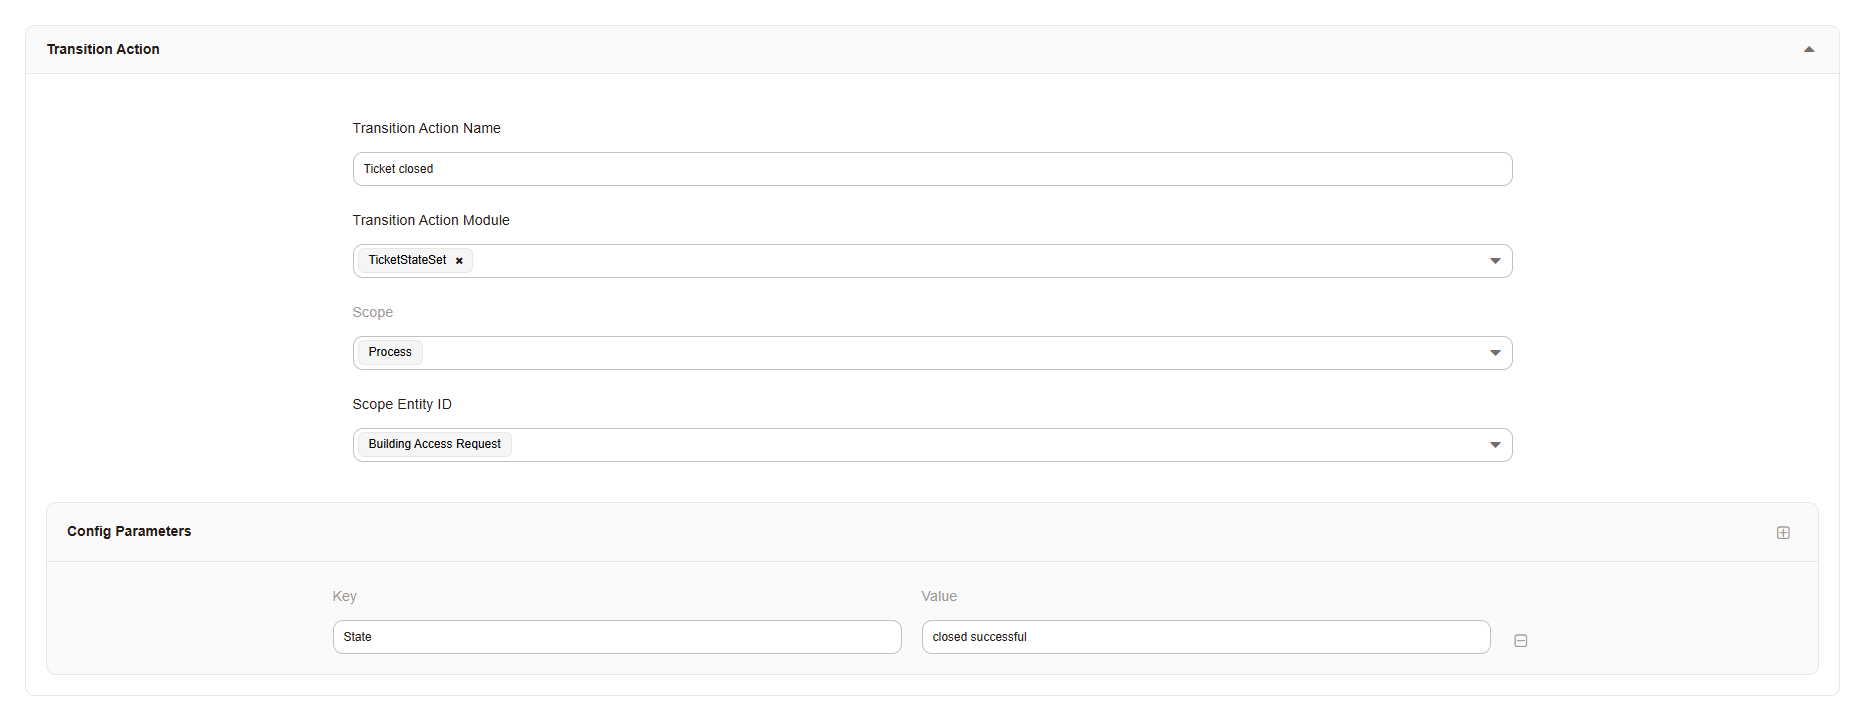
CLose TIcket#
Ticket unlock
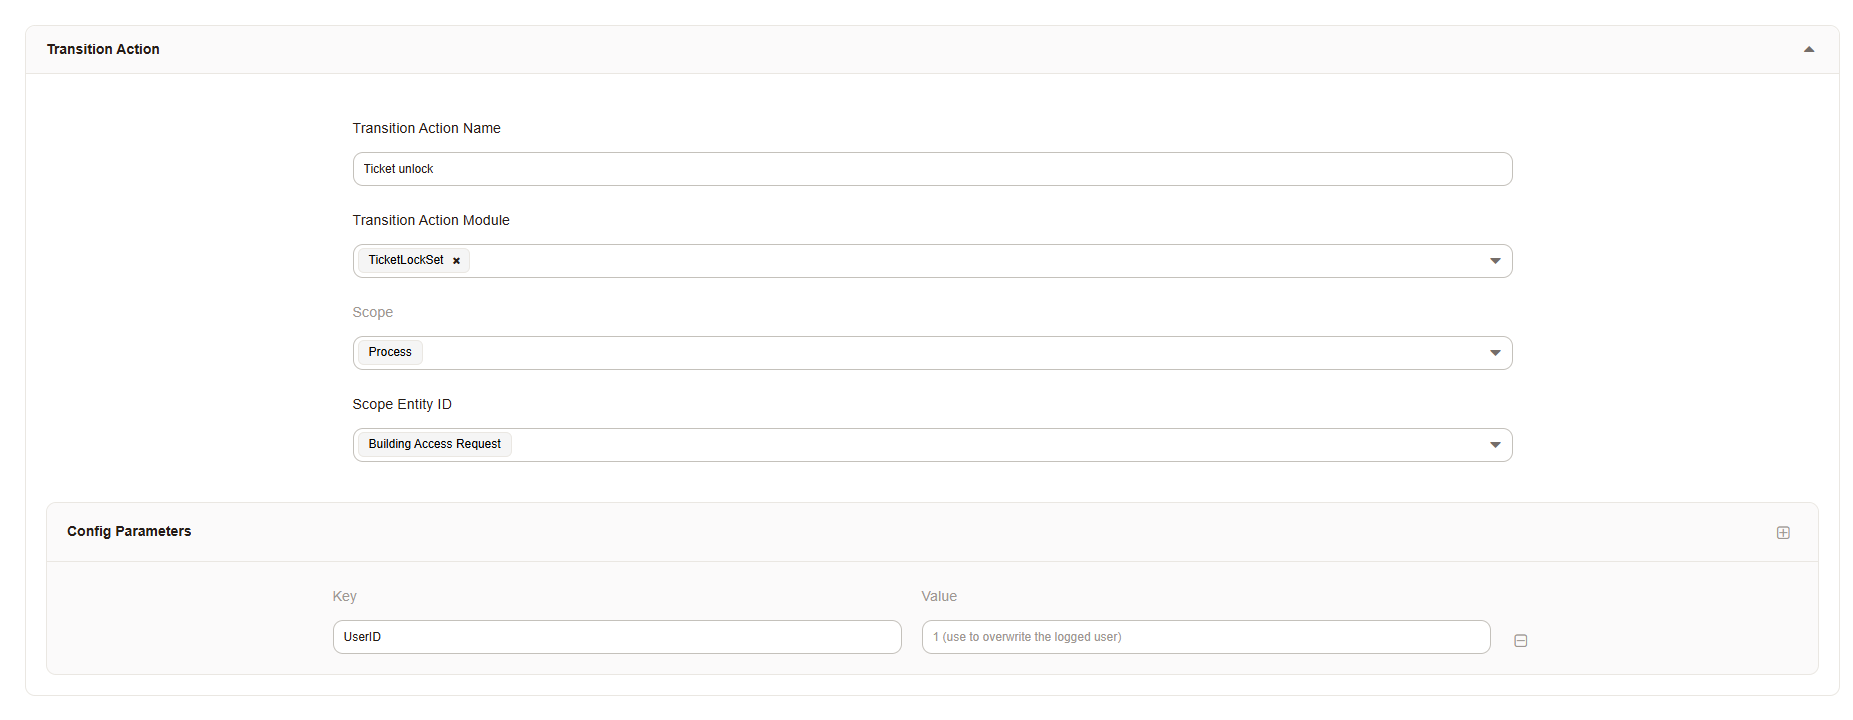
Unlock Ticket#
Model the Process#
By dragging the pieces onto the model, we can quickly assemble the process.
Modelling the Process#
Drag all activities on to the canvas.
Drag and drop the dialogs on to the activities.
Drag the transition on to an activity, and connect the arrow to the following activity.
Drag and drop tho transition actions onto the transition.
Test, Review, Revise, Release#
Customer Creation#
The customer fill and submits the request.
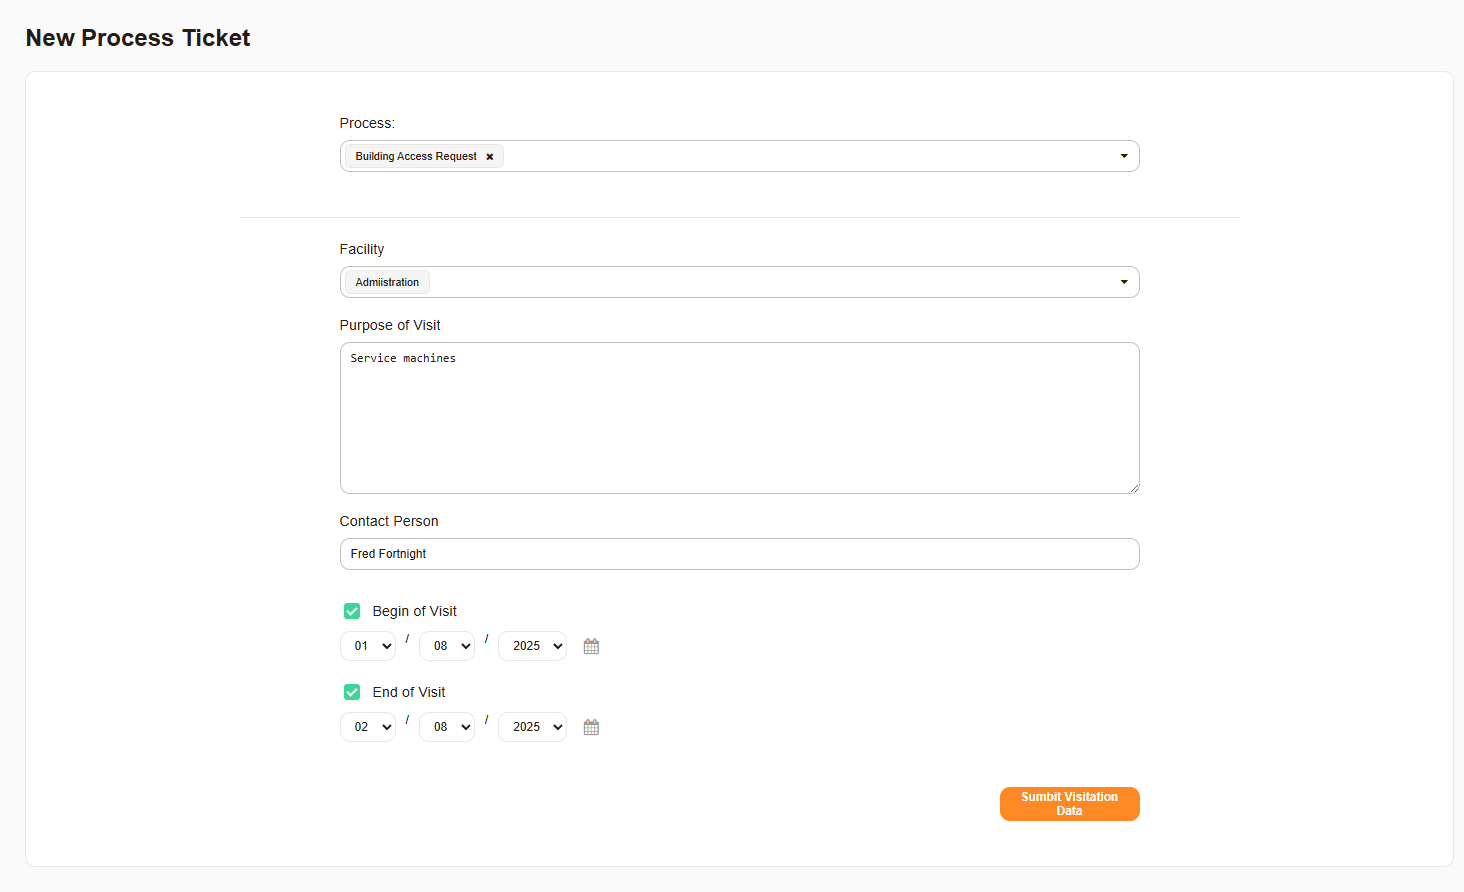
Customer Form#
Agent View#
The agent opens the pending ticket, and checks the user in and out.
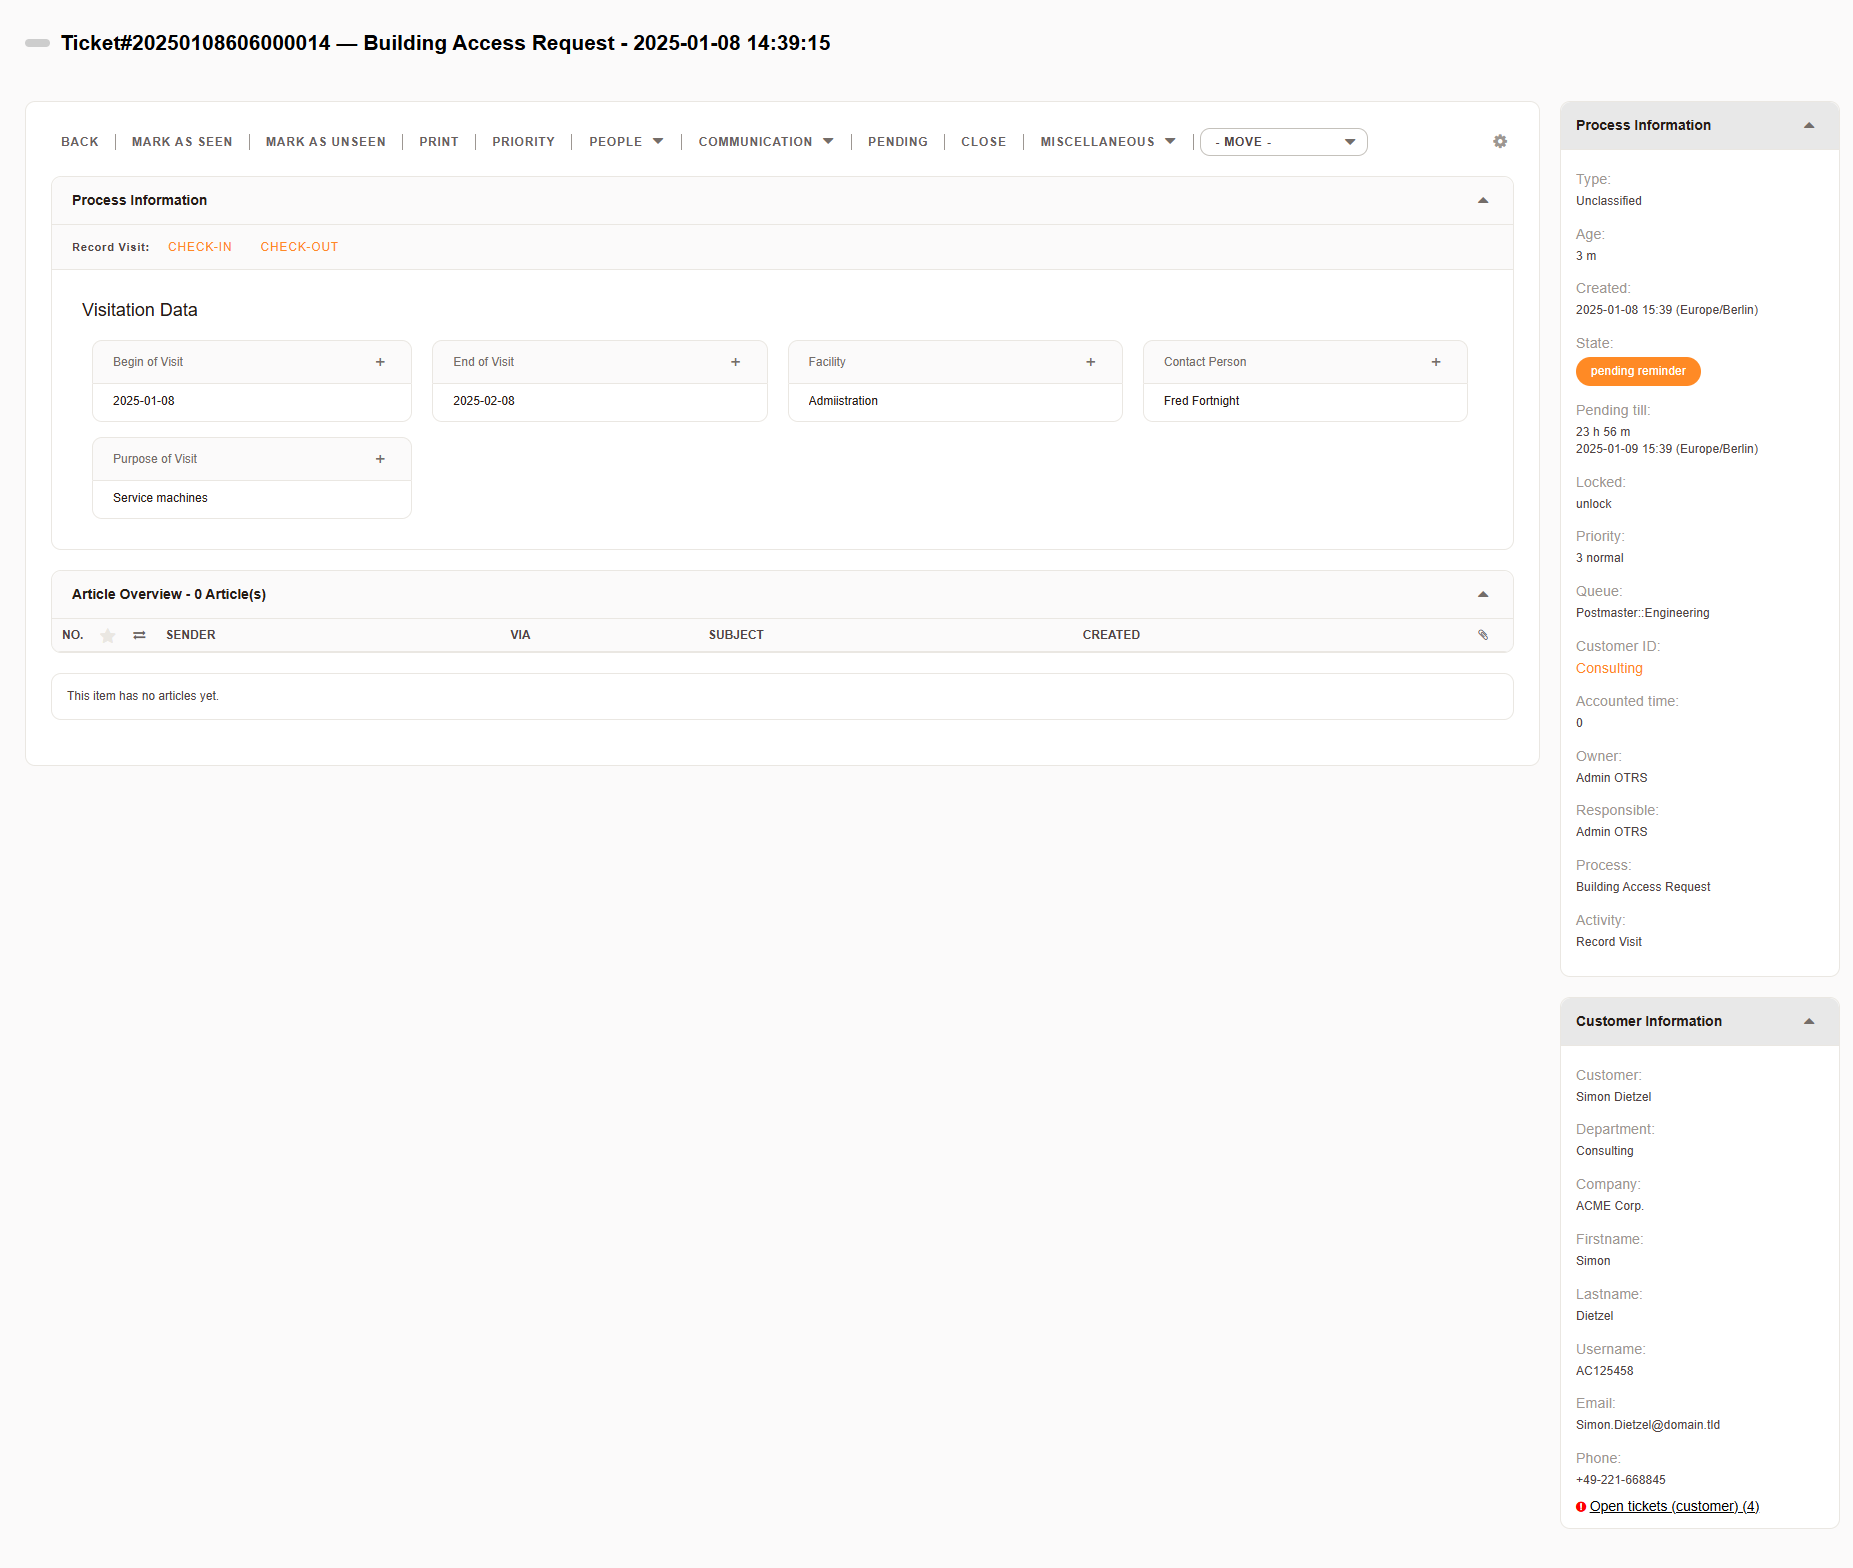
Agent View#
Process End#
The process ends and the ticket is automatically closed.
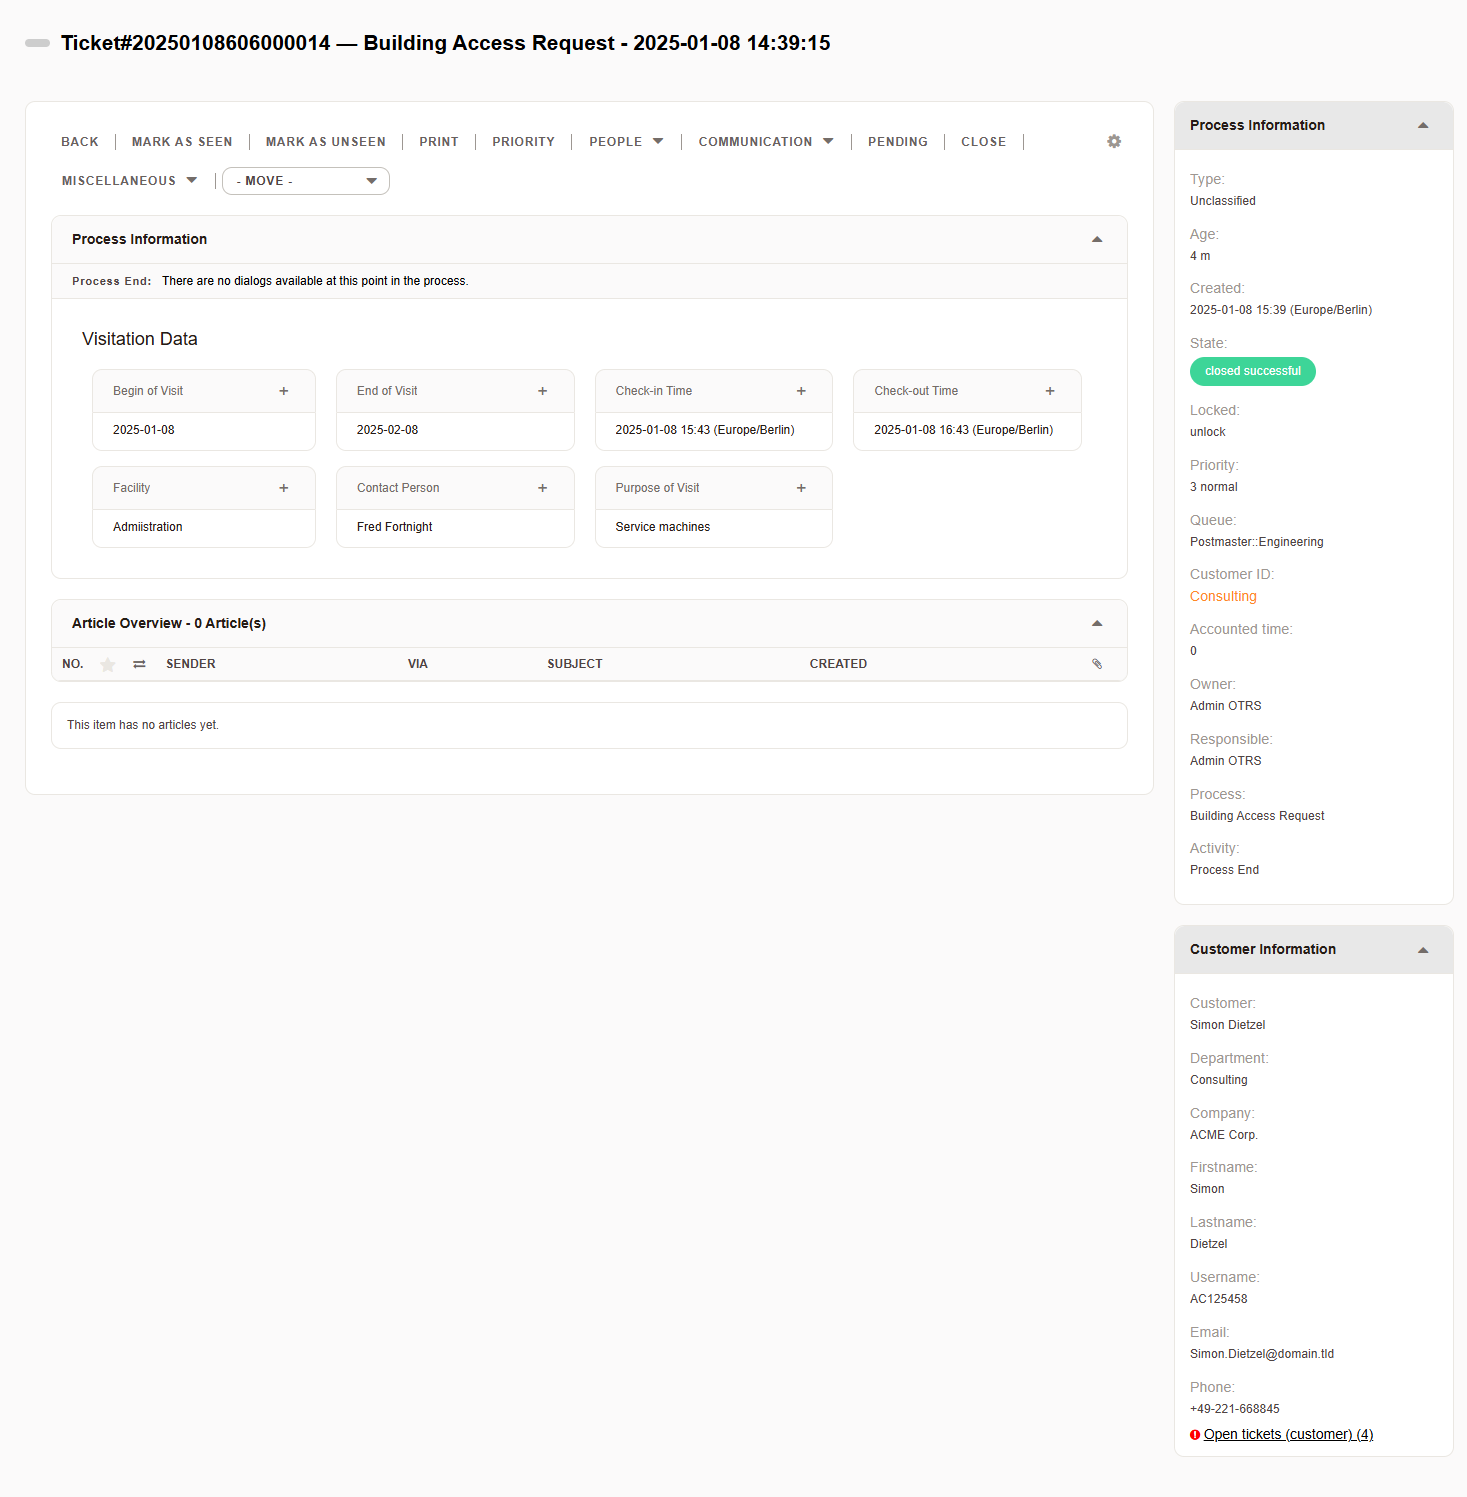
Process Ended#
Touch-ups#
To get the full effect as seen above in the screenshots, you must:
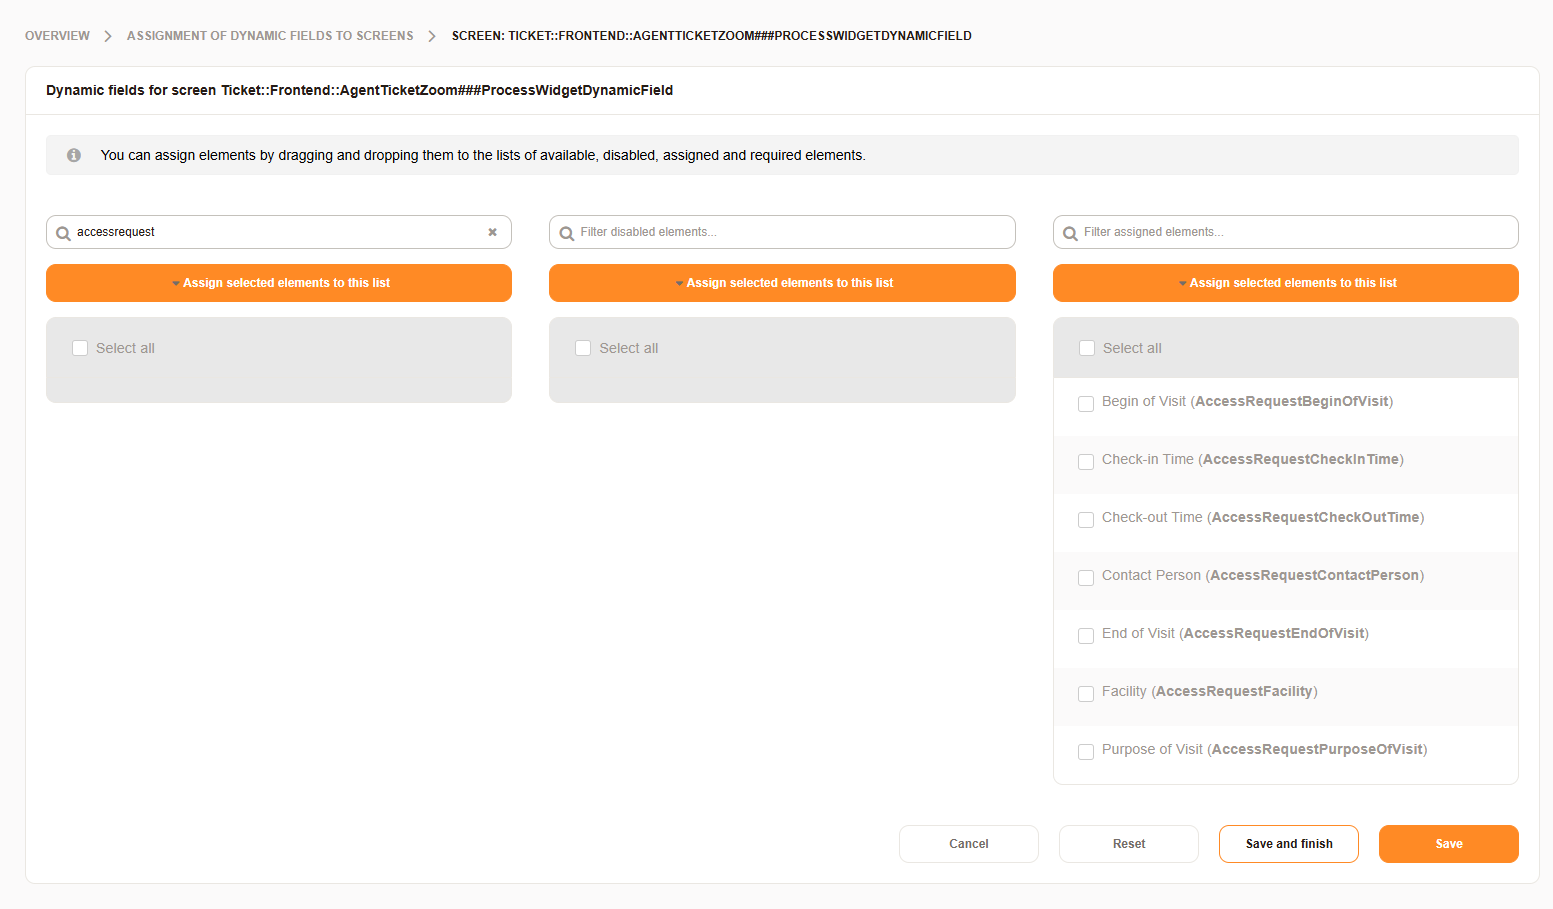
Add the Dynamic Field for Process Widget Screen#
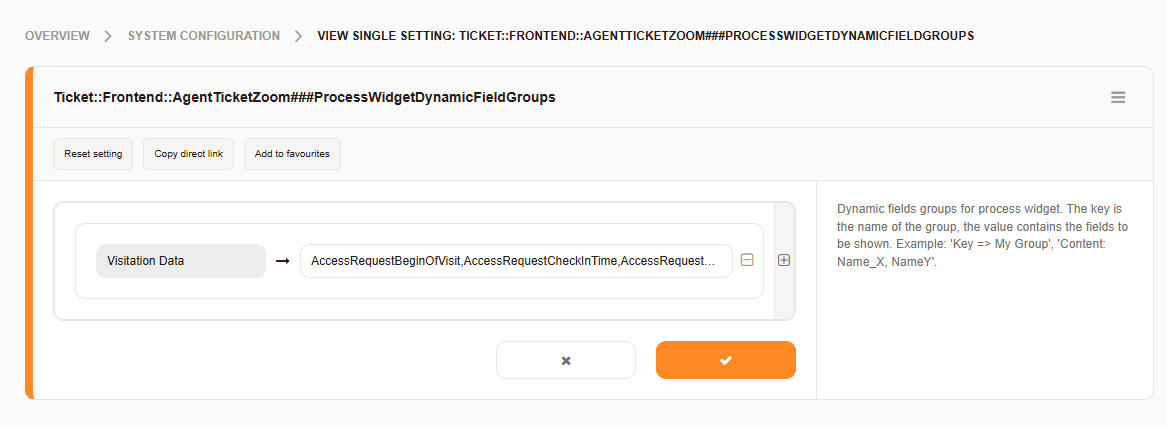
Grouping the Fields via System Configuration#
This process is by no means complete, and should be enhanced with notifications and articles, but this cannot be covered by documentation alone.