Common Features#
Article Options#
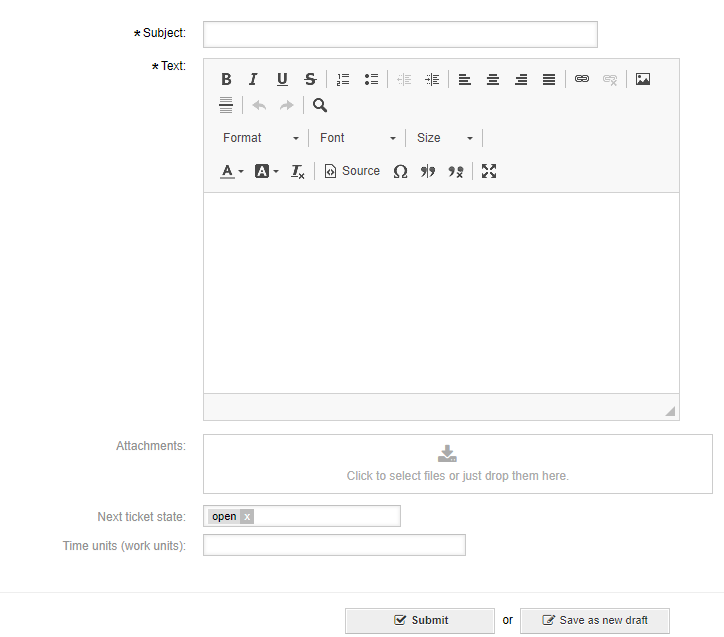
An article may be attached to a ticket. Whenever this option is available, you must enter a subject and a body. You are welcome to add images and other attachments via the upload feature. Alternatively, you can drag and drop the attachments by clicking on the attachment icon
Added in version 6.5: Attachment filename length limitation.
This setting can be used to limit the name of the file to be uploaded. By default it’s 50 Ticket::Frontend::AgentTicketZoom::DisplayedAttachmentFilenameMaxLength
Editor Options#
Using the CKEditor is mostly self-explanatory. Your administrator can add additional options by activating the EnhancedMode. This enables among other options:
tables
find and replace
subscript
superscript
paste from word
Added in version 6.4: Mentions and Text Snippet.
Mention Someone#
A user mention is done by prefixing with a single ‘@’. A group mention is prefixed by two ‘@@’.
Example: Single User
Please talk to @sbeasley about this issue.
Example: User Group
This is important for the @@developers team.
This will result in the user sbeasley, or in the second example all users of the developers group, getting a notification. The user then has read permissions on the ticket, just as with the watcher module. Additionally, any mentioned user will see a mention toolbar icon, and see the tickets in the agent dashboard.
All those receiving a text body with a mention will have a mailto: link to directly contact the mentioned person via e-mail.
Use a Snippet#
Snippets are available on a queue-by-queue basis. You may therefore not have a snippet available for use.

State Options#
State options may be attached to the article, as seen above, or be detached. Available state options can be affected by system configuration options. These include:
if a state is available
which state, if any, is preselected
In some cases, the selected state is optional. Removing it keeps the last state unchanged. In cases where the last state is not an available option, set a new state from the available options.
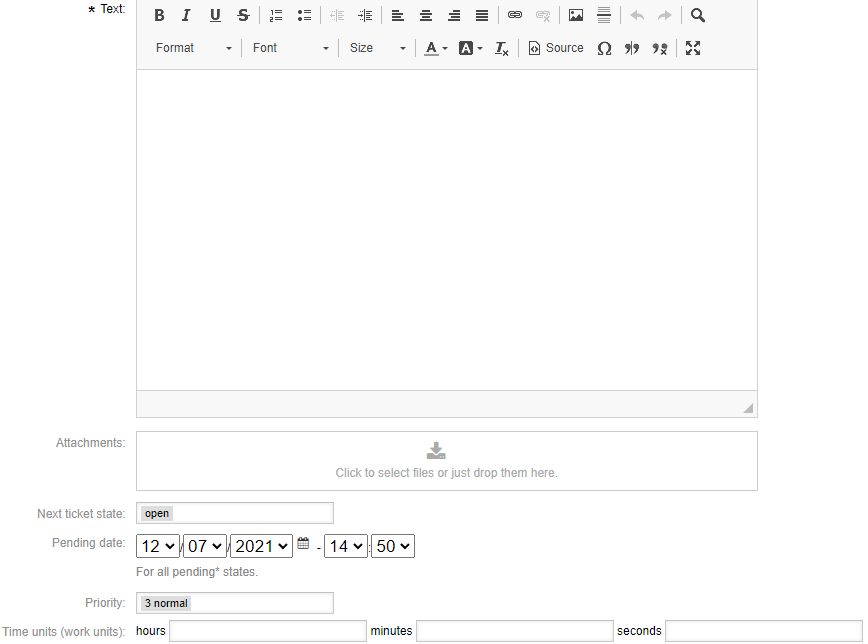
Pending State#
If a pending or pending auto type state is selected a date-time selector appears.

Ticket Locking#
Communication screens lock the ticket temporarily to a user writing a response to or conducting a phone call with a customer. Canceling the action then returns ownership of the ticket to the original owner, and other users can work on the ticket.
A lock requirement is configurable on all screens. The system configuration option is always. Ticket::Frontend::<ScreenName>###RequiredLock The screen name can be found in the address bar as the Action parameter.
Example:
You would see https://znuny.example.com/otrs/index.pl?Action=AgentTicketPriority;TicketID=1 in the status bar, or by right-clicking the link and copying the URL.
The name of the screen seen in the Action parameter is AgentTicketPriority.
If you want to make setting the priority a locking event, then the configuration item would be: Ticket::Frontend::AgentTicketPriority###RequiredLock.
Note
Searching for the Action in the system configuration is the quickest way to find available options.
Accounting Time#
Time Accounting
Added in version 6.3.
It’s possible to enter time units in all screens where composing an article. These time units can be a positive or negative number, which will increase or decrease the total time accounted on the ticket respectively.
Instead of the default text field, you can now select units from a configurable dropdown list of options. Selectable units are defined system-wide by the system administrator.
This feature can be activated with Ticket::Frontend::AccountTimeType in the system configuration.
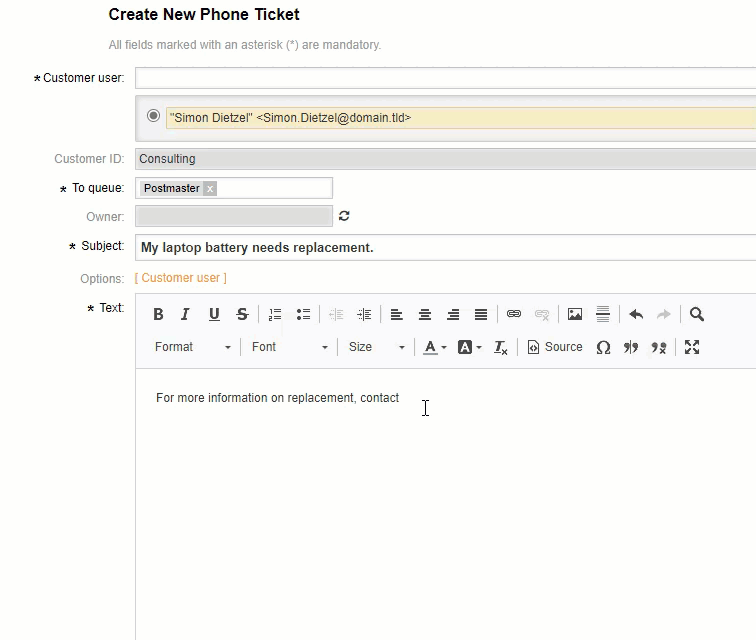
Adding A Customer User At Creation#
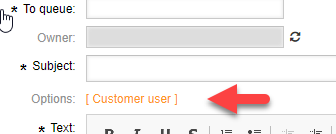
Everywhere you create a ticket it’s possible to search for a customer from all data sources. Additionally, if you look at the options link, directly above the editor, you can choose to select a customer user from the database, or add a customer user to a writeable back-end when creating a ticket. When you have added a or selected the customer user, the user will automatically be added to the ticket and the popup will disappear.