Installing Features#
Package Manager#

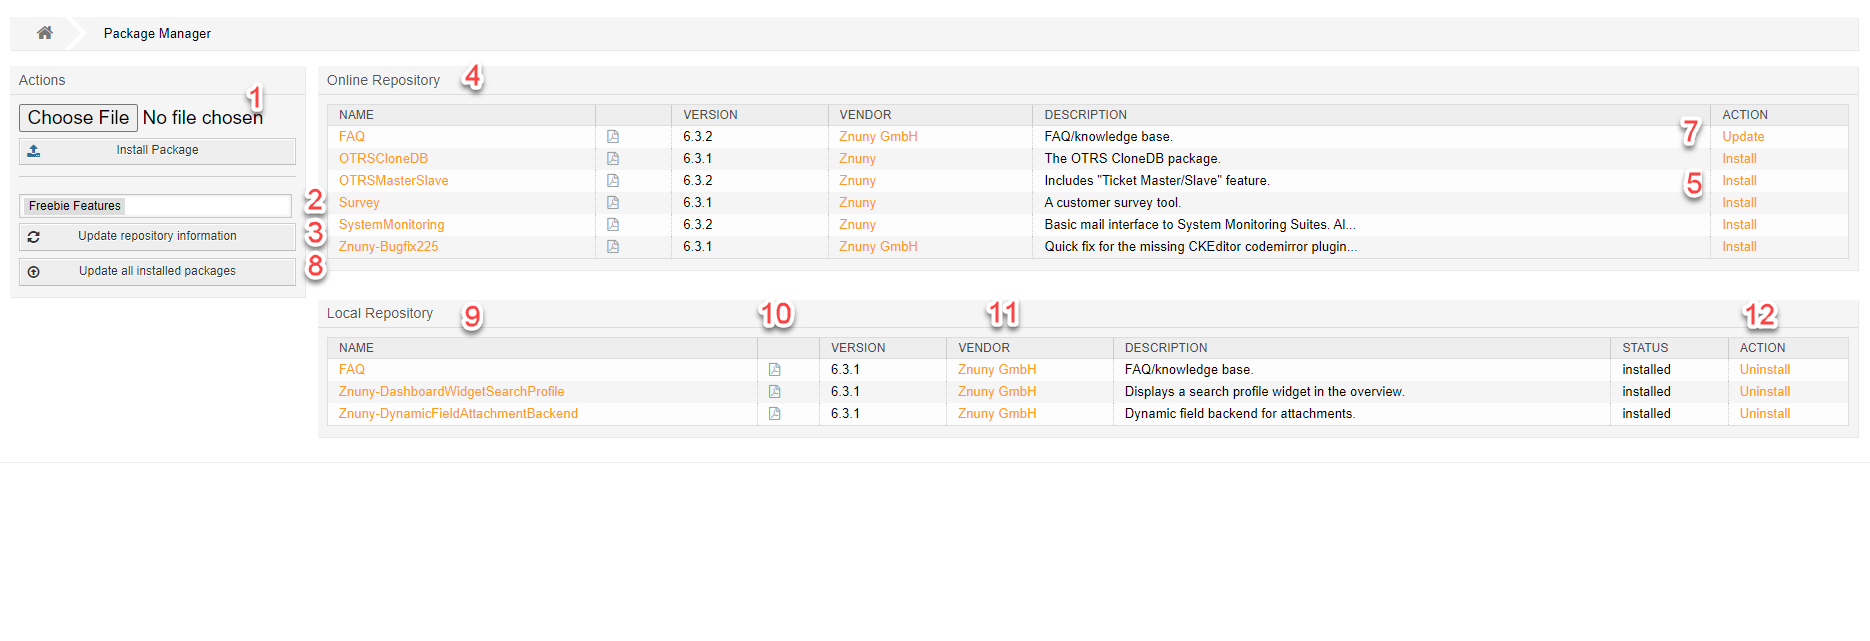
In the image above, you can see the different functions of the Package Manager.
Choose an OPM to install from the local filesystem
Choose the desired package repository
Update the online repository
View the available packages
Install a package
View the installed packages
Update an individual package
Update all packages on a system
Display package contents
Download documentation
Link to the vendor’s website
Uninstall the package
Package Information#
Clicking on the package name to display the package contents link will send you to a screen that shows you the installation status of the package as well as gives you other options.

In the general information screen you see:
- Description
What the package does, in short.
- Build Date
When the package was built.
- Build Host
Host name which built the package.
- Framework
The framework must be installed to use this package.
- License
The license used for the add-on.
- MD5 Sum
The MD5 sum for package verification.
- Name
The name of the package.
- Package Merge
The name of the package which is to be replaced by this package.
- URL
Vendor or add-on website.
- Vendor
Vendor name.
- Version
Add-on version.
Package Actions#
In the actions menu, you can perform specific actions as described below.
Go back to the overview
Download the OPM from the database
Rebuild the package
Reinstall the package
Note
Rebuilding the package will generate an OPM file for download with your changes. Use where ever possible the Custom/ folder to replace files for better compatibility.
Reinstalling the package can be necessary to fix issues or after a source update.
Package Health#
Packages may not sometimes be properly installed get corrupted or have changes made by somebody on the system. By clicking on the name of the package you can see the status of the package itself. If a package has been improperly installed or is not completely installed, you will also see a clickable notification that accesses the same screen as by clicking on the package name. The first part of this will show you the general package information, the second part will show you the files included and their status, and the third part will show you any type of code which will be run during installation or uninstall including databases when they are going to be created and dropped. This last point is very important when uninstalling a package to make sure that you make a copy of your database tables for the future in case you need them because they will be deleted upon removal of the package.

File Management#
If a package is not completely installed or has a modified file you will see a red X (1) next to the file name by clicking on this you will be able to get to this screen which will show you a diff of the file and the changes that have been made so that you can restore these if necessary. Restoring is done by reinstalling the package. This will not affect the database data or any other settings within your system. you can also download individual files by clicking on the disk (2) icon on the right-hand side.

Change Log#
Each updated package brings its new features and fixes to the package installed. This is shown in the change log area.

Review Code and Database Changes#
Executed code or changes to the database structure will be seen in this section.

Package Prerequisites#
Added in version 6.5: Dependency Validation
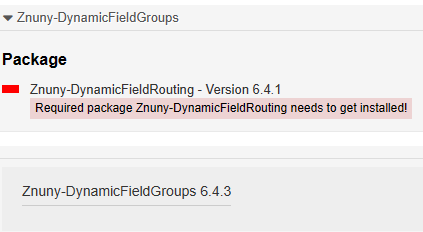
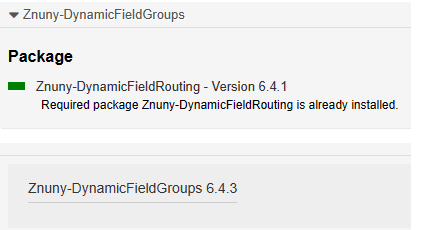
It’s possible that some packages have dependancies. In such case, the dependencies are checked prior to installation.
Missing Dependency#

Dependency Met#
