- How to migrate existing Windows installations to Linux
- Introduction and preparation
- Get OTRSCloneDB script to clone databases
- Enable remote access for the PostgreSQL database of target system
- Stop OTRS services
- Drop the existing database of your target system to have an empty database for the clone data
- Get the PostgreSQL password of your database
- Clone your database into the target system
- Copy the following files from your Windows based system to the target system
- Reinstall all packages
- Disable remote access for the PostgreSQL database of your target system
- Start OTRS services
OTRS can be run on a wide range of system platforms, including Enterprise Linux Platforms such as Red Hat Enterprise Linux, and SUSE Linux Enterprise Server, as well as a series of other Linux derivatives.
However, when running OTRS on Windows platforms we have encountered repeated performance losses, and despite an exhaustive analysis, it has not been possible to solve these issues to our satisfaction due to technical differences. It is thus with a heavy heart that we have ceased development on our Windows Installer and the OTRS Appliance due to the currently limited availability of necessary third-party components offered by other vendors.
Under these circumstances, we are not able to guarantee the continuing operation of OTRS on Windows platforms, and therefore recommend migrating to one of the Linux platforms mentioned above or recommend using our OTRS Business Solution™ Managed.
To make it easier for you to migrate from Windows to Linux and to offer you the best OTRS performance, we have prepared detailed instructions for you here.
If you have a Windows based installation and you would like to change to a Linux based system you will need to setup a Linux server or virtual machine and install OTRS there (see the installation instructions). This will be the target system for the migration.
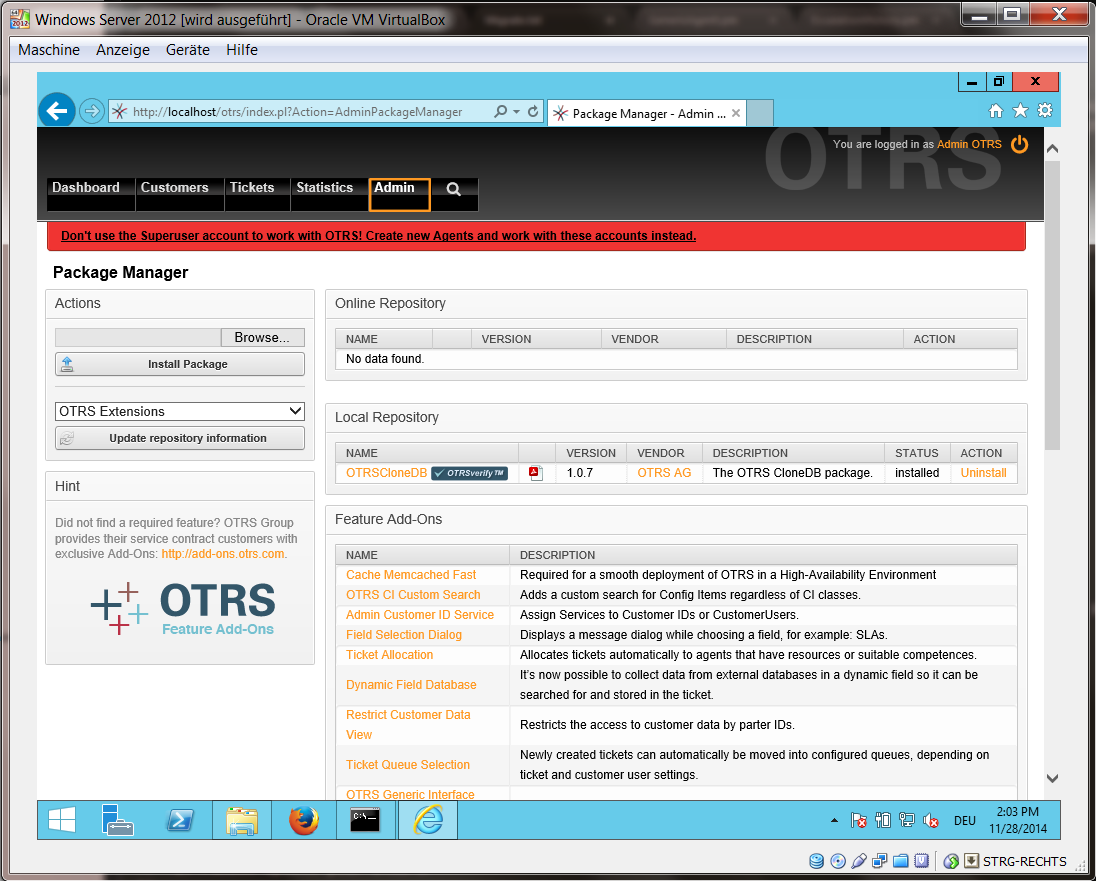
Please go to the admin menu of the Windows based system and install the newest version of OTRSCloneDB package into your OTRS:
You can install the OTRSCloneDB package directly from the package manager. Select "OTRS Extensions" from the dropdown list on the left and click on the button "Update repository information" below. Then the OTRSCloneDB package will be shown in a list where you can click on "Install".
You could also download the package manually from the OTRS FTP server and install the package manually as described below. http://ftp.otrs.org/pub/otrs/packages/
Please download the package with the highest version number:
OTRSCloneDB-1.0.13.opm
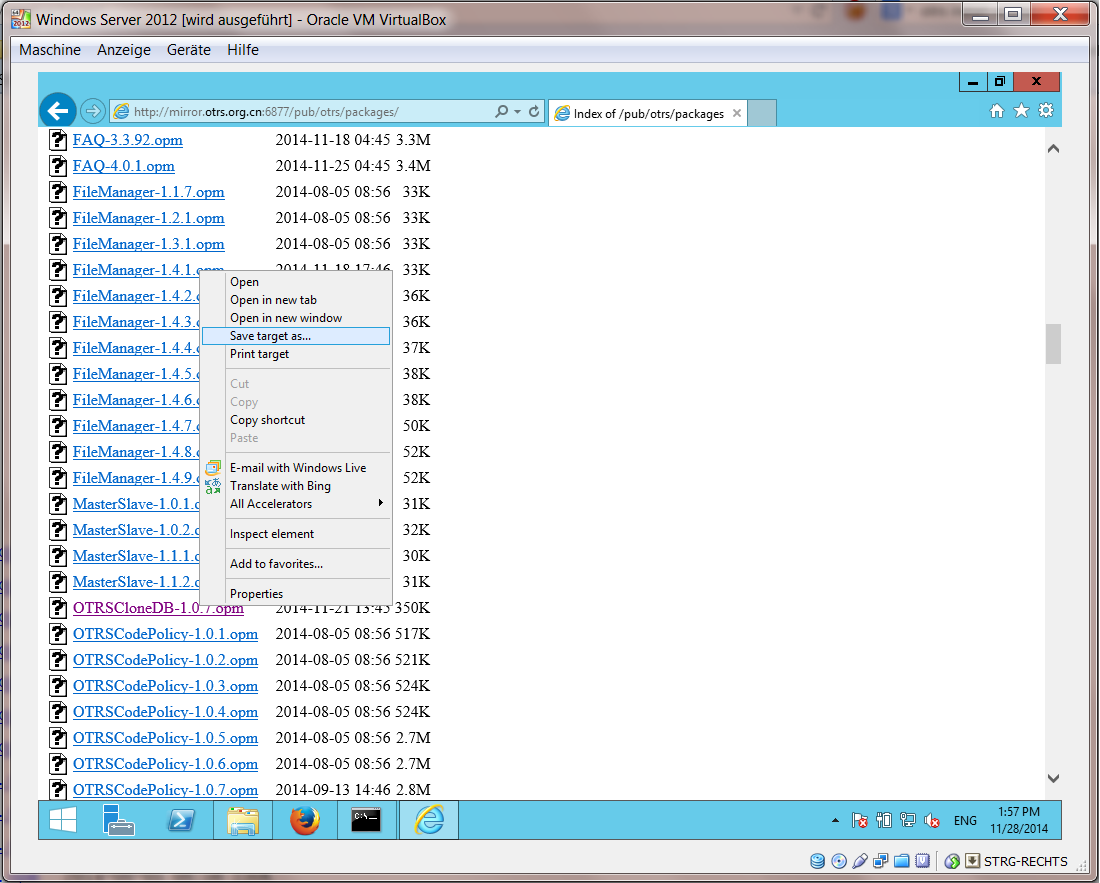
and install it to your Windows based installation:
It is also no problem if you have installed some additional features or custom developments on your OTRS. You just need to take care that all of your installed packages are also compatible with Unix based systems. For packages provided by OTRS this is the case.
The OTSRCloneDB script will copy the database data over the network, so we need to enable remote access to the database. The setup is different for the different databases, we will describe opening remote access for a PostgreSQL database here.
After logging into your target system via SSH you need to change into the postgresql directory:
shell> cd /etc/postgresql/9.4/main
shell> vi postgresql.conf
Add the following line at the end of the file:
listen_addresses = '*'
Save the file.
shell> vi pg_hba.conf
Add the following line at the end of the file:
host all all 0.0.0.0/0 md5
Save the file.
Restart your PostgreSQL server:
shell> service postgresql restart
Stop all running services of your target system:
shell> service cron stop
shell> service apache2 stop
shell> su - otrs
shell> cd /opt/otrs/
shell> bin/Cron.sh stop
shell> bin/otrs.Daemon.pl -a stop
shell> exit
The OTRSCloneDB script will not remove the data in the existing otrs database of the target system, so we need to do this manually:
Change the user to the postgresql user:
shell> su - postgres
Drop the existing otrs database:
shell> dropdb otrs
Create a new otrs database for the otrs user:
shell> createdb --owner=otrs --encoding=utf8 otrs
Go back to root user:
shell> exit
Change into the OTRS directory of your target system:
shell> cd /opt/otrs
and take a look at the configuration file of your target system:
shell> less Kernel/Config.pm
You will find your database password if you scroll down a bit:
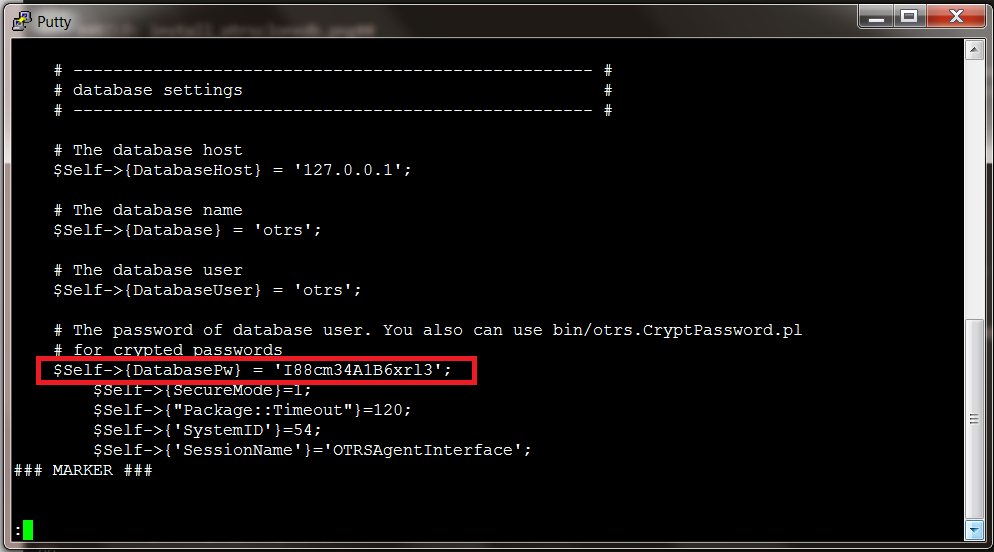
In our example:
I88cm34A1B6xrl3
Write the password down on a piece of paper.
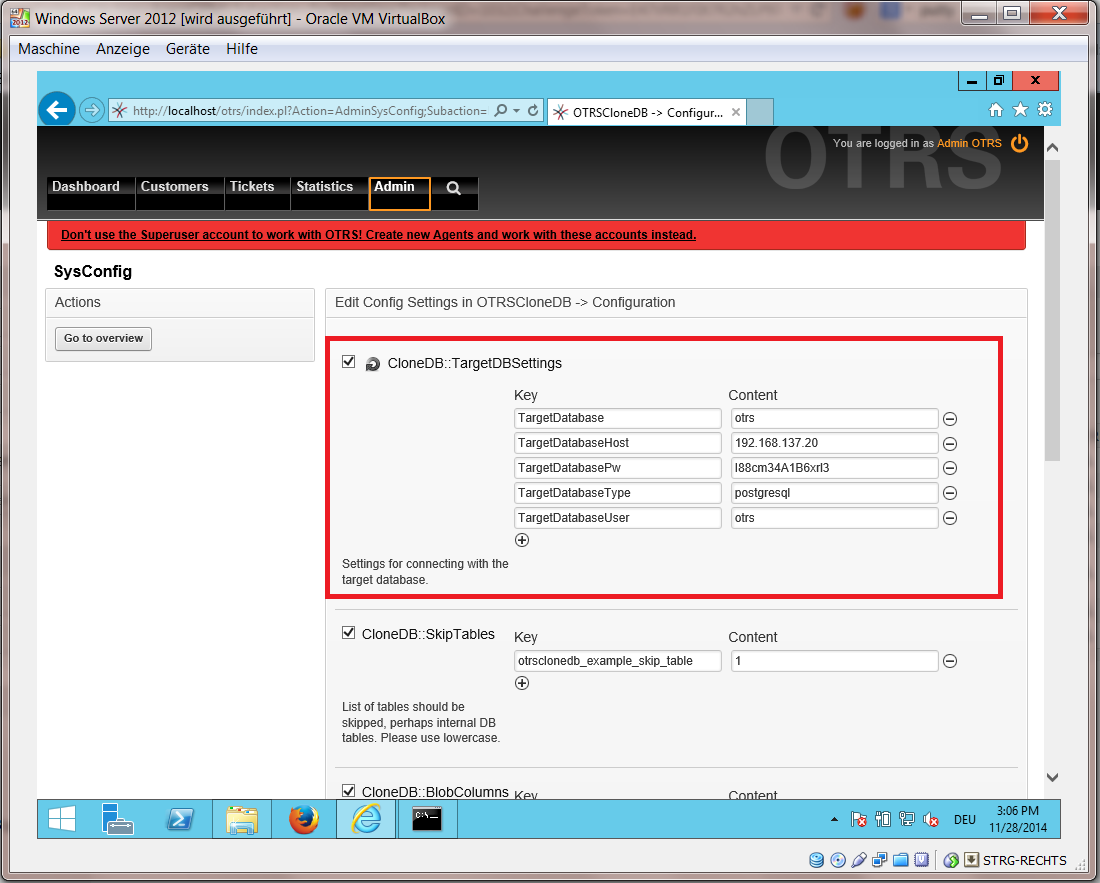
Switch back to your Windows based installation and open the SysConfig admin menu. Please select the group "OTRSCloneDB" and the subgroup "Configuration":
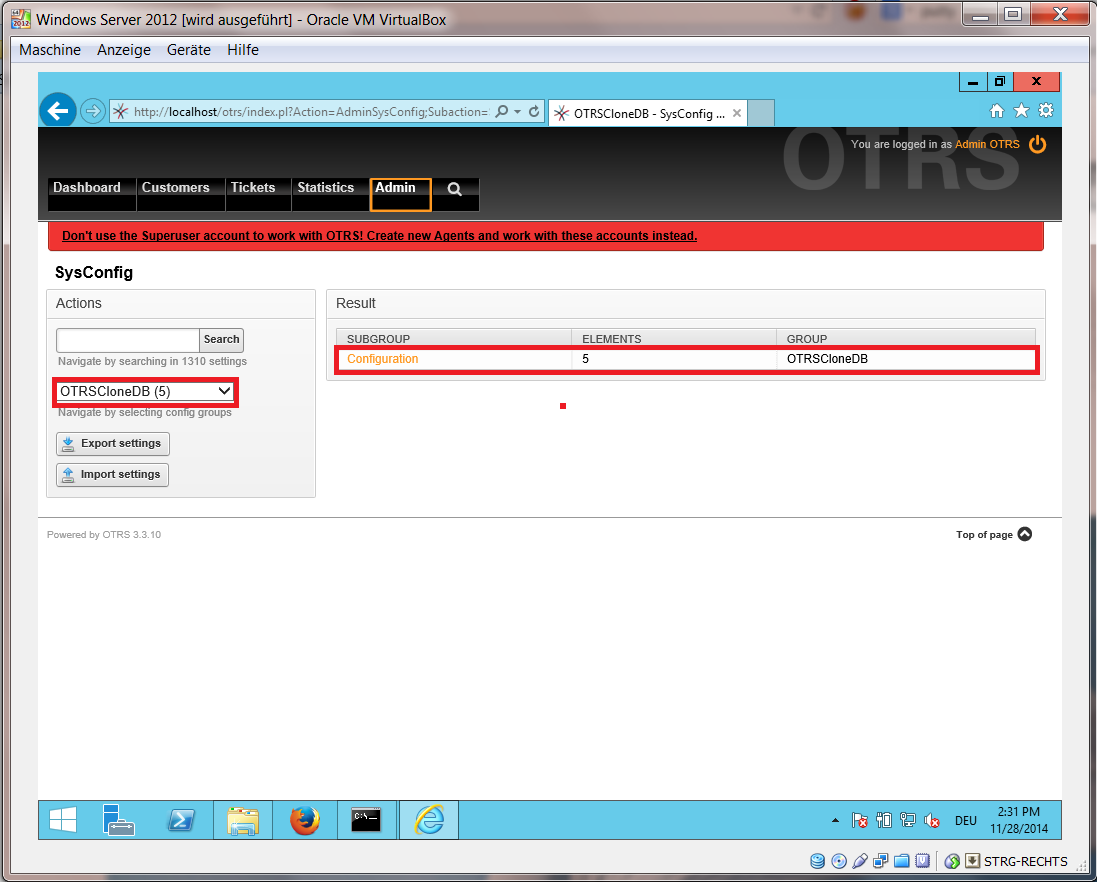
We need to configure the SysConfig option OTRSCloneDB::TargetSettings with the following values:
TargetDatabaseHost => 192.168.137.20 (Here you need to enter the ip address of your target system)
TargetDatabase => otrs
TargetDatabaseUser => otrs
TargetDatabasePw => I88cm34A1B6xrl3 (Here you need to set the password of your target system)
TargetDatabaseType => postgresql
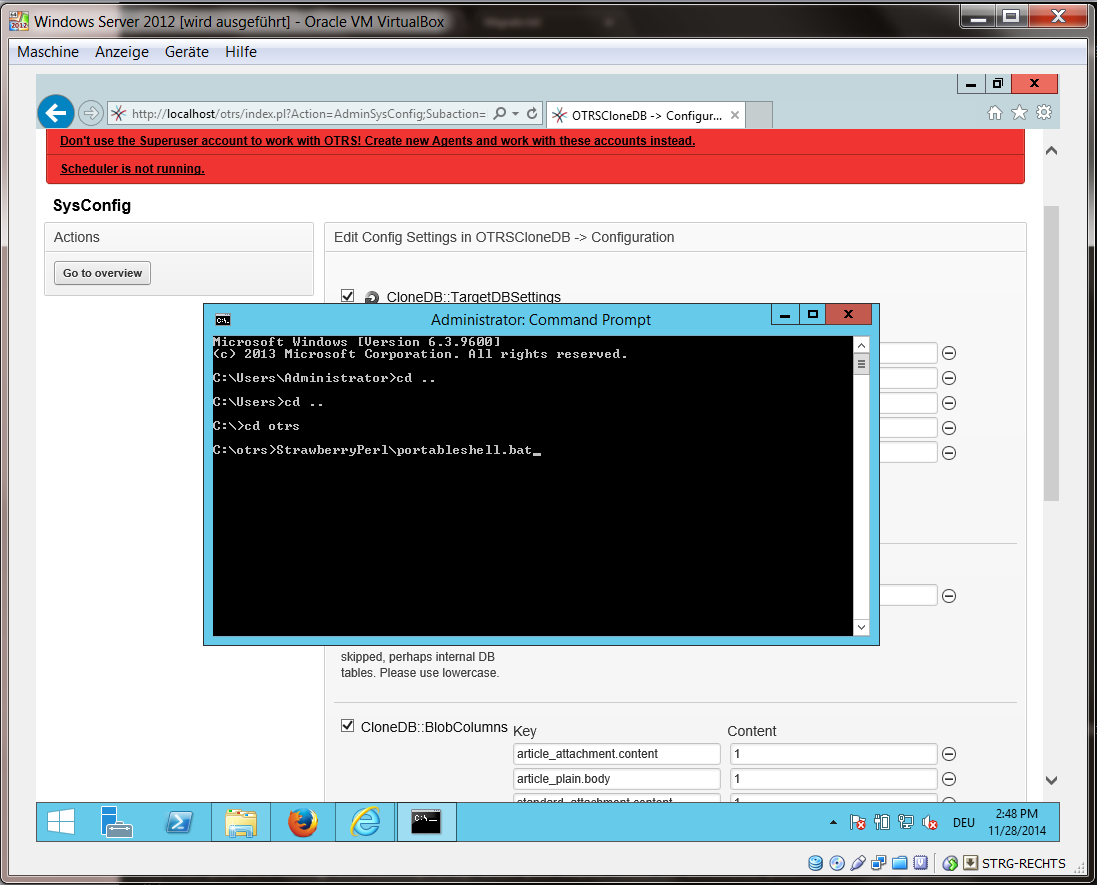
To run the OTRSCloneDB script we need to switch to the command prompt of our Windows based OTRS and to change into the base directory of our OTRS installation:
shell> cd "C:\otrs"
If you are using StrawberryPerl, then you maybe need to activate your shell for Perl:
shell> StrawberryPerl\portableshell.bat
The OTRSCloneDB script is located in the bin directory of the OTRS directory.
shell> cd "OTRS\bin"
Run the OTRSCloneDB script:
shell> perl otrs.CloneDB.pl
Now you should see some information about the script and its parameters.
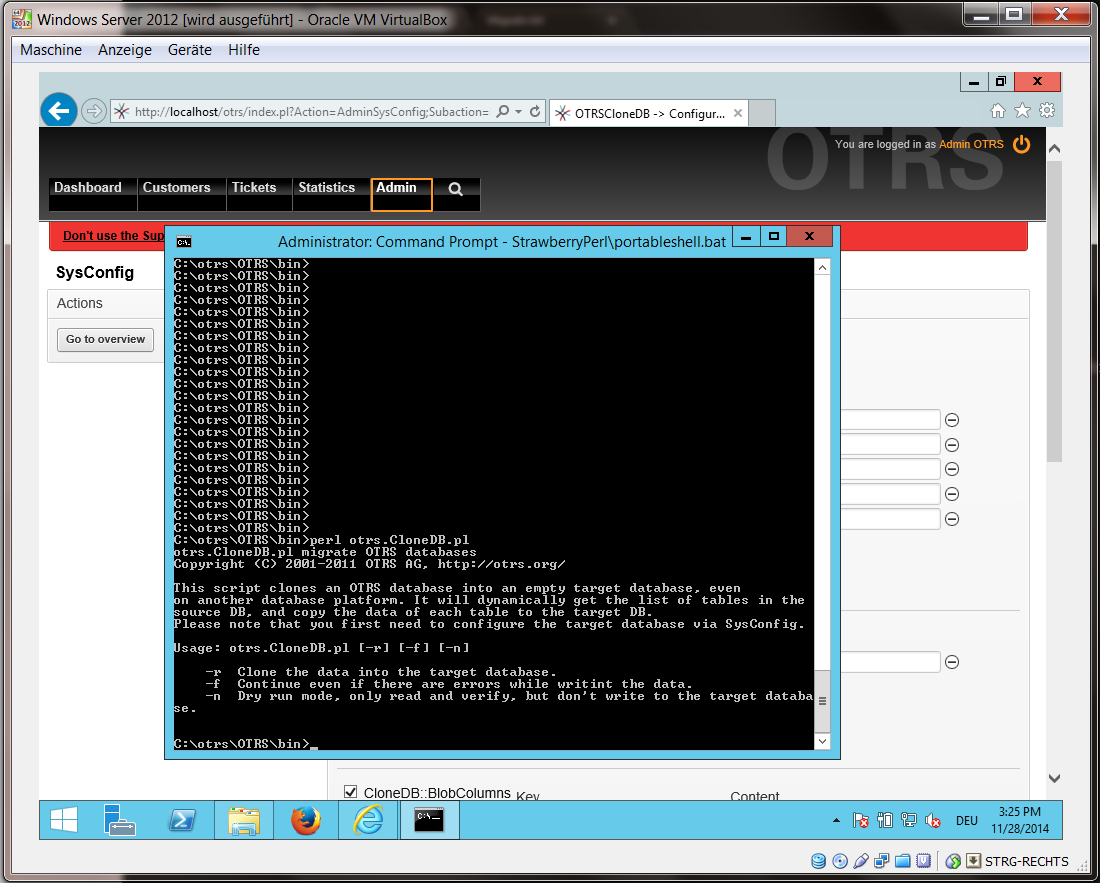
Note... Errors which occur at running without any parameters could relate to wrong login data for the database or problems with the database connection.
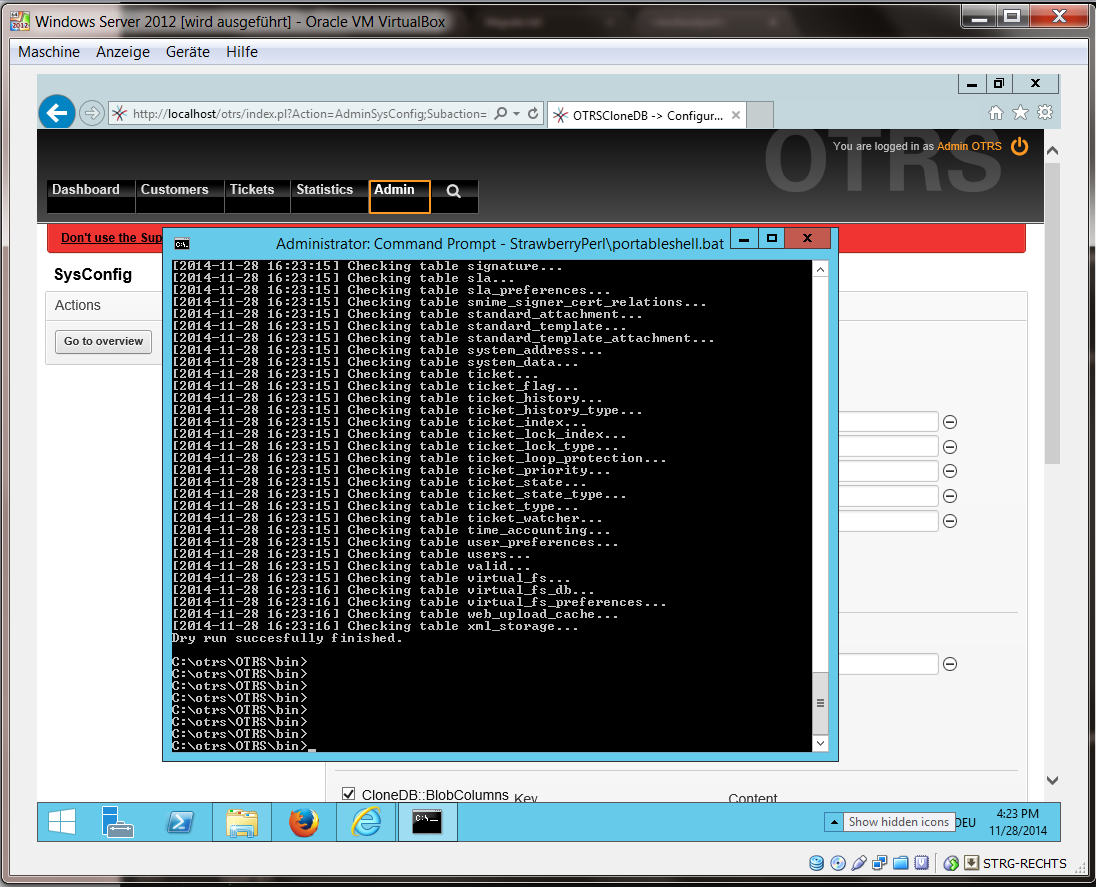
If no errors occurred, check if the dry run is successful:
shell> perl otrs.CloneDB.pl -n
Start the cloning of your database and cross your fingers:
shell> perl otrs.CloneDB.pl -r
An example of a successfully run look like this:
Generating DDL for OTRS.
Generating DDL for package OTRSCloneDB.
Creating structures in target database (phase 1/2)
...
...
Creating structures in target database (phase 2/2)
...
done.
You need to copy some files from your Windows based system to the target system. You can do this for example with a free tool like "WinSCP" (just search the internet for "WinSCP"). Copy the following files from your Windows based system:
C:\otrs\OTRS\Kernel\Config\GenericAgent.pm
C:\otrs\OTRS\Kernel\Config\Files\ZZZAuto.pm
C:\otrs\OTRS\var\article\*
C:\otrs\OTRS\var\log\TicketCounter.log
to your target system:
/opt/otrs/Kernel/Config/GenericAgent.pm
/opt/otrs/Kernel/Config/Files/ZZZAuto.pm
/opt/otrs/var/article/*
/opt/otrs/var/log/TicketCounter.log
Open the file /opt/otrs/Kernel/Config/Files/ZZZAuto.pm on the target system and replace all paths like "C:/otrs/OTRS/" with "/opt/otrs/"!
If you have have manually changes in your Kernel/Config.pm then please copy these changes to the target system's Kernel/Config.pm. Don't copy it 1:1 because you will now have different database settings and the file paths on the target system are different from Windows!
Reinstall all packages with the package manager to get all custom files back.
shell> bin/otrs.SetPermissions.pl --otrs-user=otrs --otrs-group=otrs --web-user=www-data --web-group=www-data /opt/otrs
shell> su - otrs
shell> cd /opt/otrs
shell> perl bin/otrs.Console.pl Maint::Cache::Delete
shell> perl bin/otrs.Console.pl Maint::Loader::CacheCleanup
shell> perl bin/otrs.Console.pl Admin::Package::ReinstallAll
shell> exit
Fix all permissions in your OTRS system again:
shell> bin/otrs.SetPermissions.pl --otrs-user=otrs --otrs-group=otrs --web-user=www-data --web-group=www-data /opt/otrs
Undo all steps you did to enable the remote access for the PostgreSQL database to your target system.
Change into postgresql directory:
shell> cd /etc/postgresql/9.4/main
shell> vi postgresql.conf
Remove the following line at the end of the file:
listen_addresses = '*'
Save the file.
shell> vi pg_hba.conf
Remove the following line at the end of the file:
host all all 0.0.0.0/0 md5
Save the file.
Restart your postgresql server
shell> service postgresql restart
Start services of your target system:
shell> service cron start
shell> service apache2 start
shell> su - otrs
shell> cd /opt/otrs/
shell> bin/Cron.sh start
shell> bin/otrs.Daemon.pl -a start
Now you should be able to open the OTRS of your target system in the browser with the imported data of your Windows based system.